On a Garden Railroad, things are always changing…
Refurbishing the Mill
The focus of the layout is the mill, which of lately has begun to lean considerably. The upper floor of the mill was originally constructed of particle board, which after several years of Florida weathering, needed to be replaced. The first step was to dismantle the top floor and remove the badly warped particle board. Hardy board, which is made of concrete was selected as a replacement material for the floor, hoping it will tolerate our extreme weather changes better than any other material. Unfortunately, I did not think to document this project until I had finished it some days ago, but hope to get out the camera for that purpose.
Besides the mill, several other buildings are looking shabby and work is needed on figures, plants, roads and pretty much everything on the layout. Also, a few new structures and features will soon be introduced to the site soon.
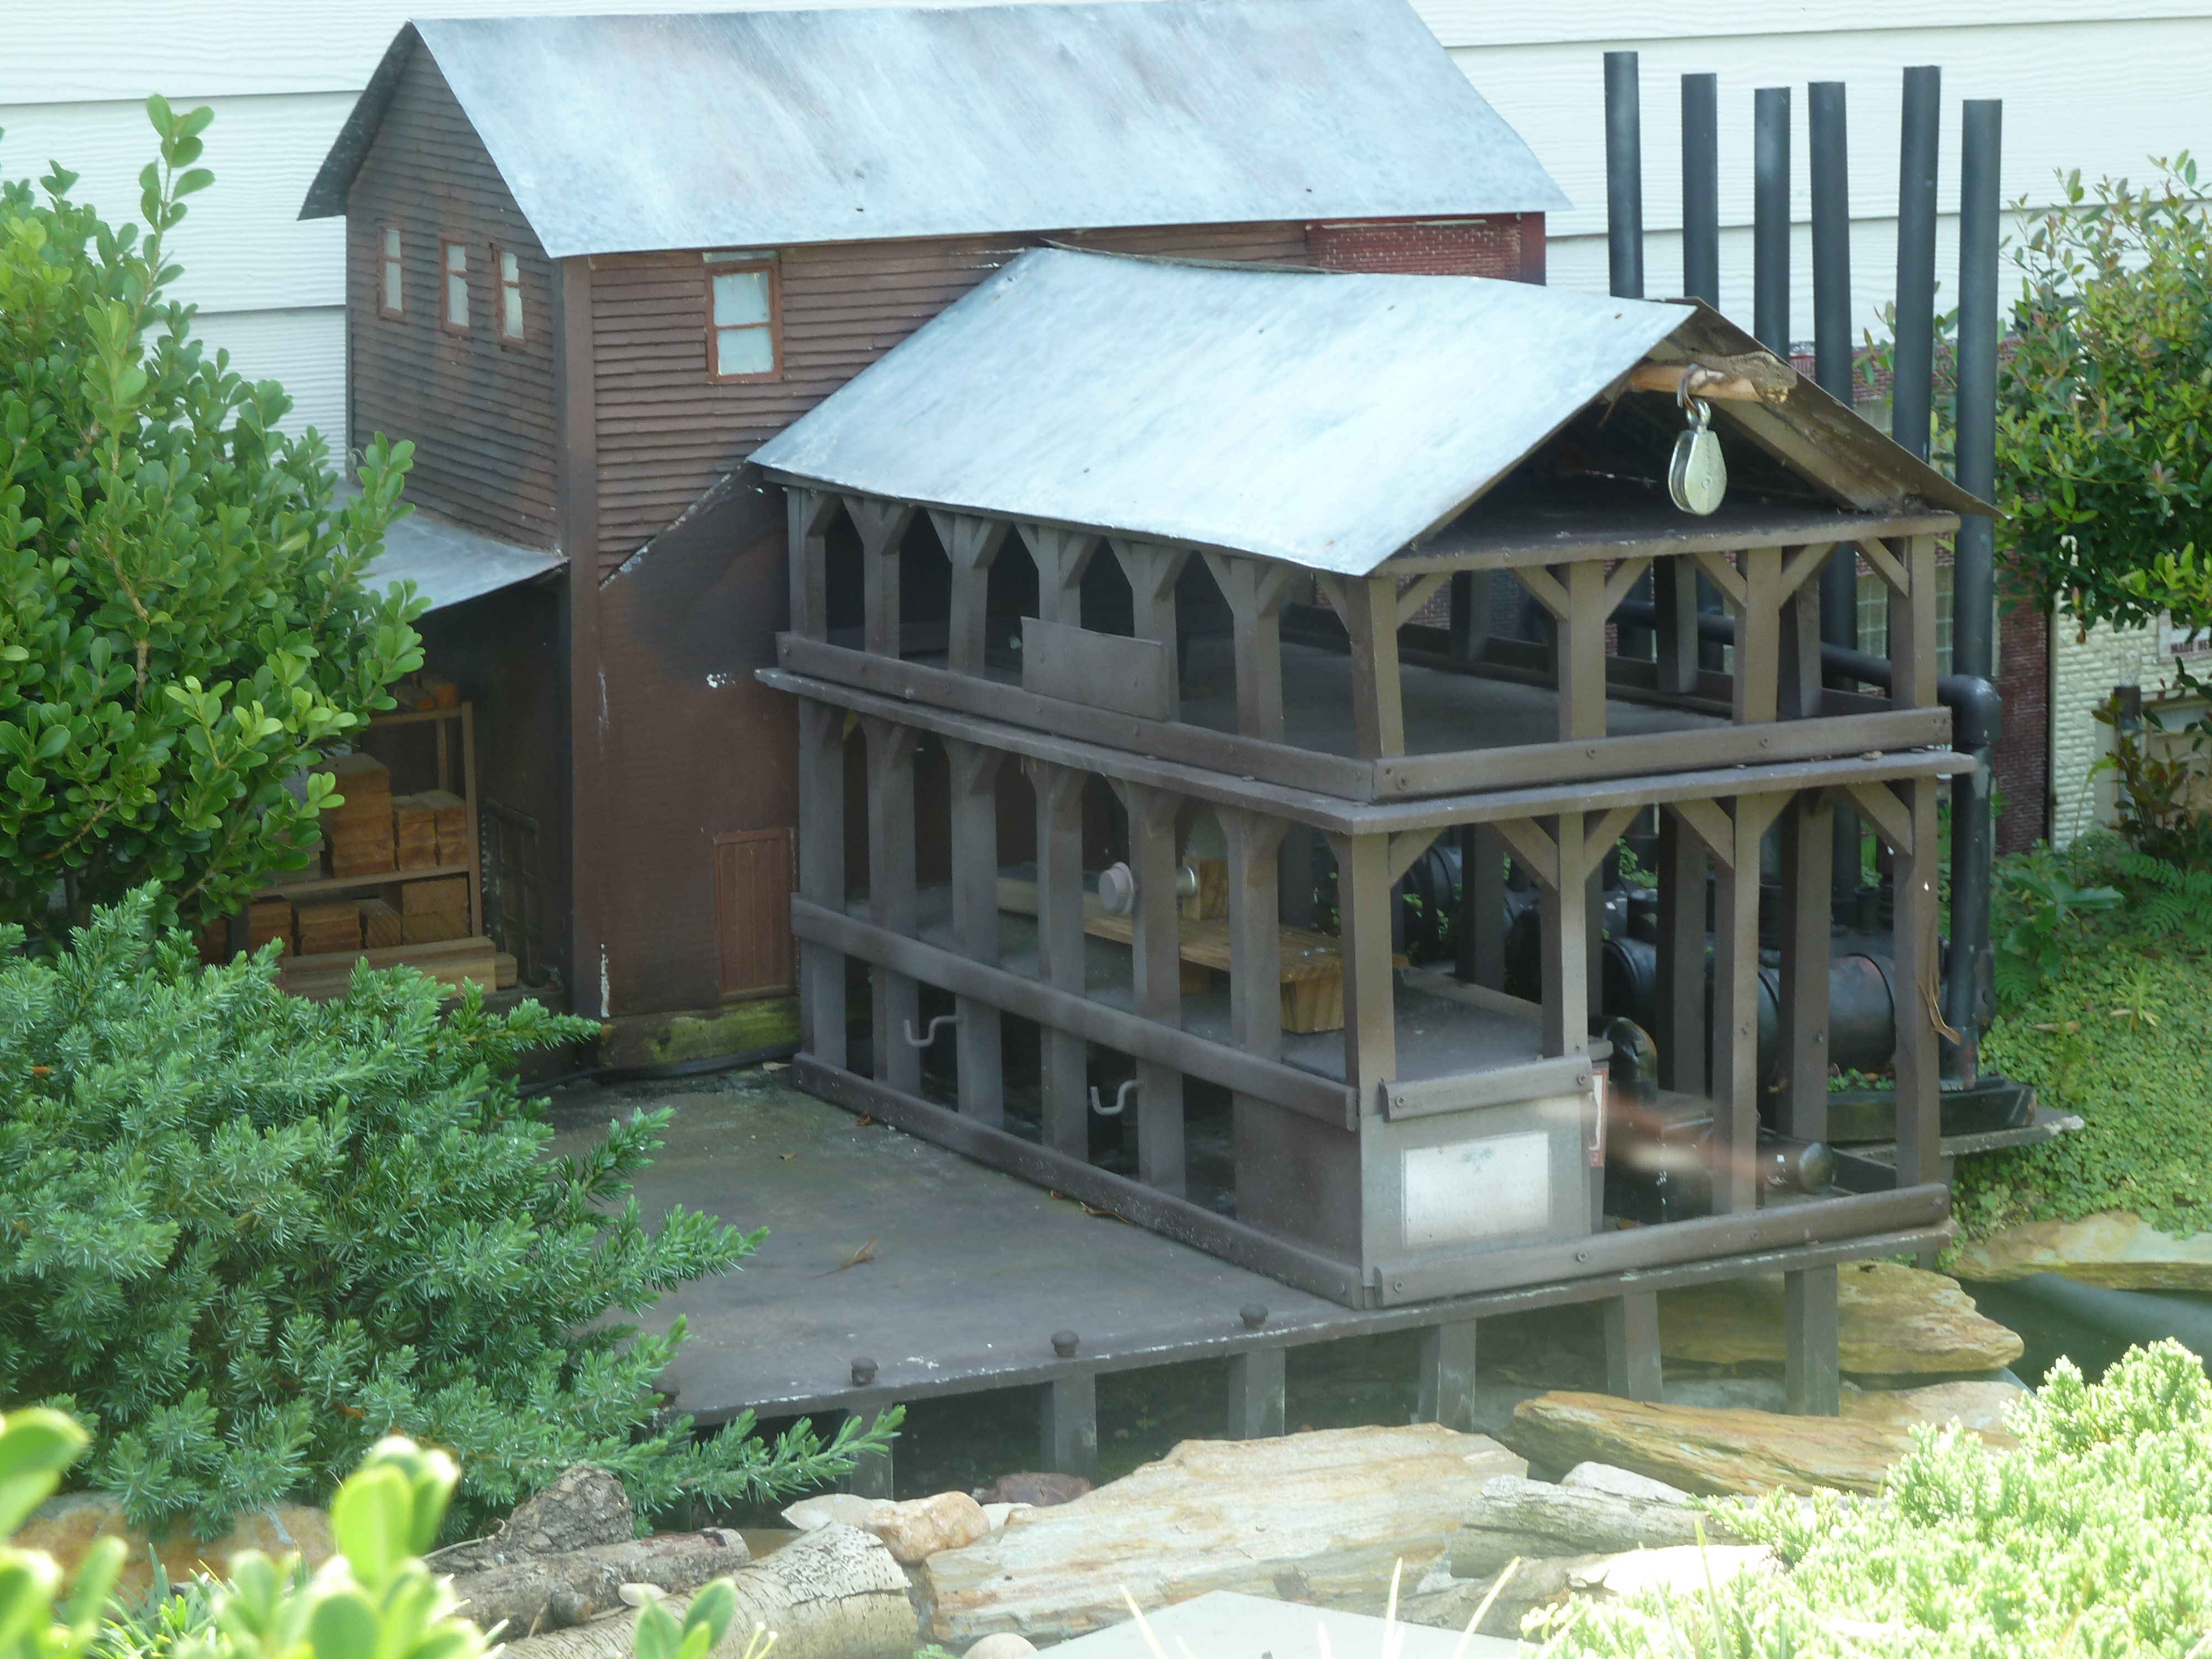
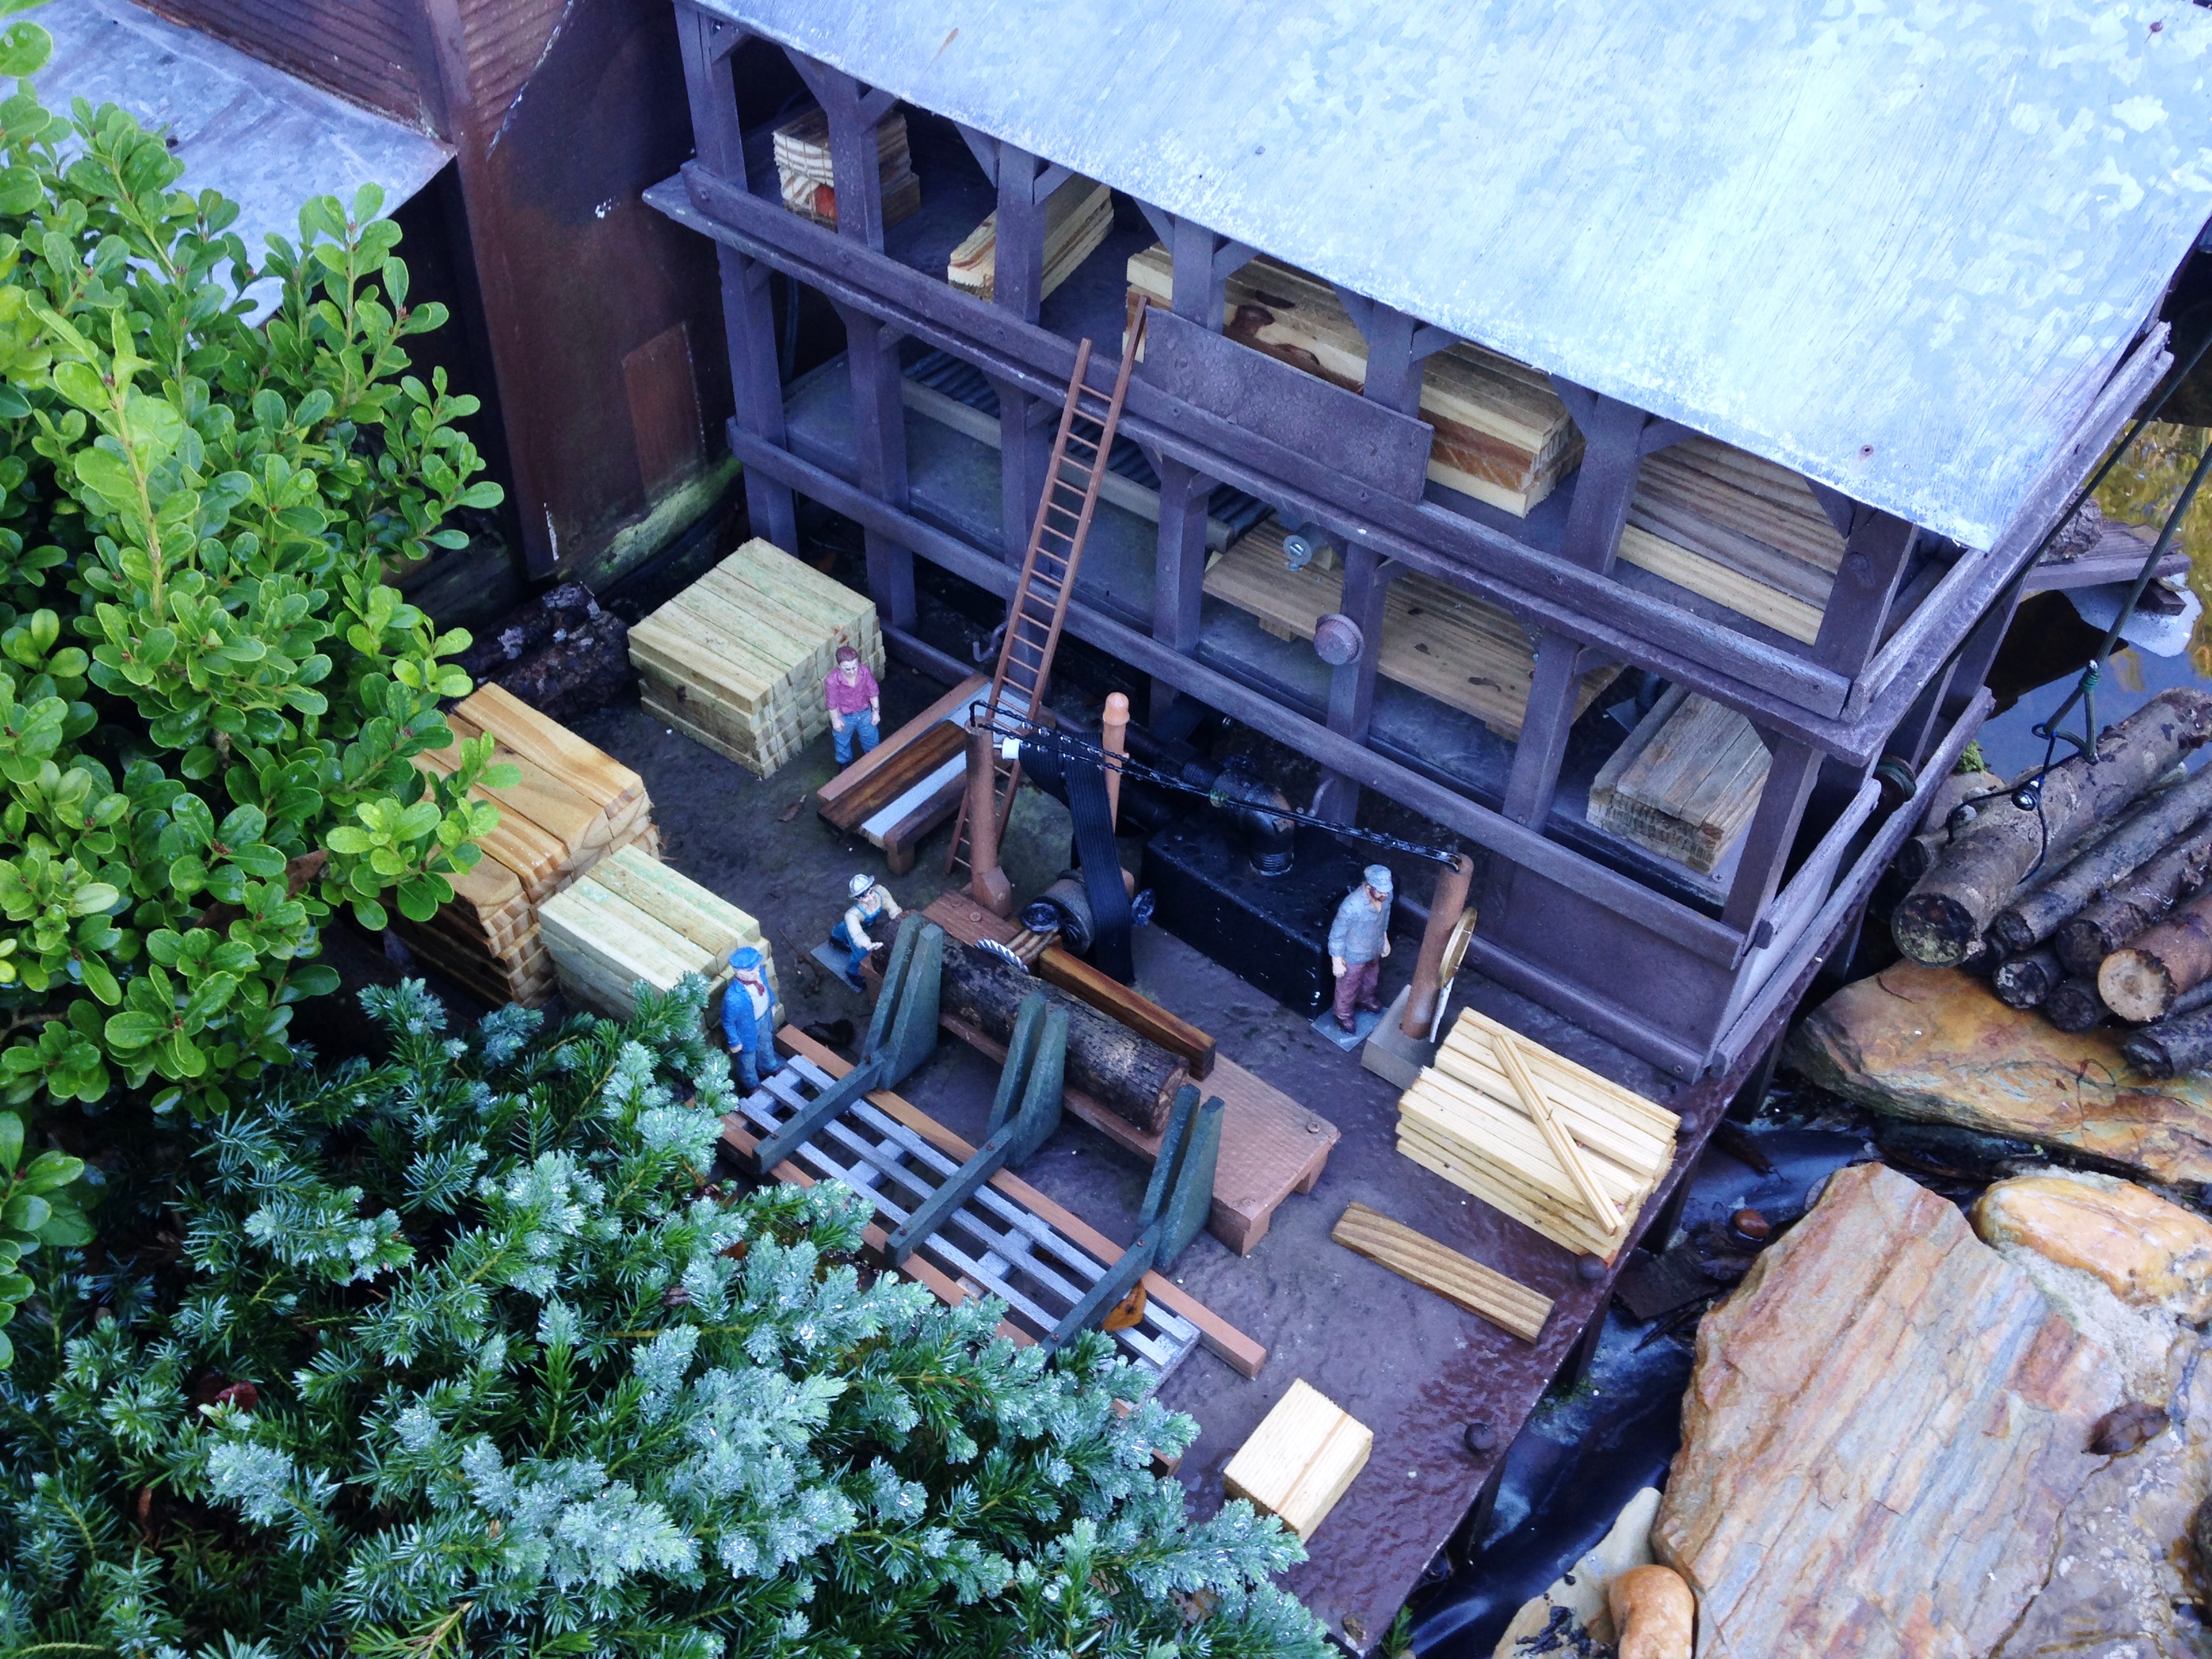
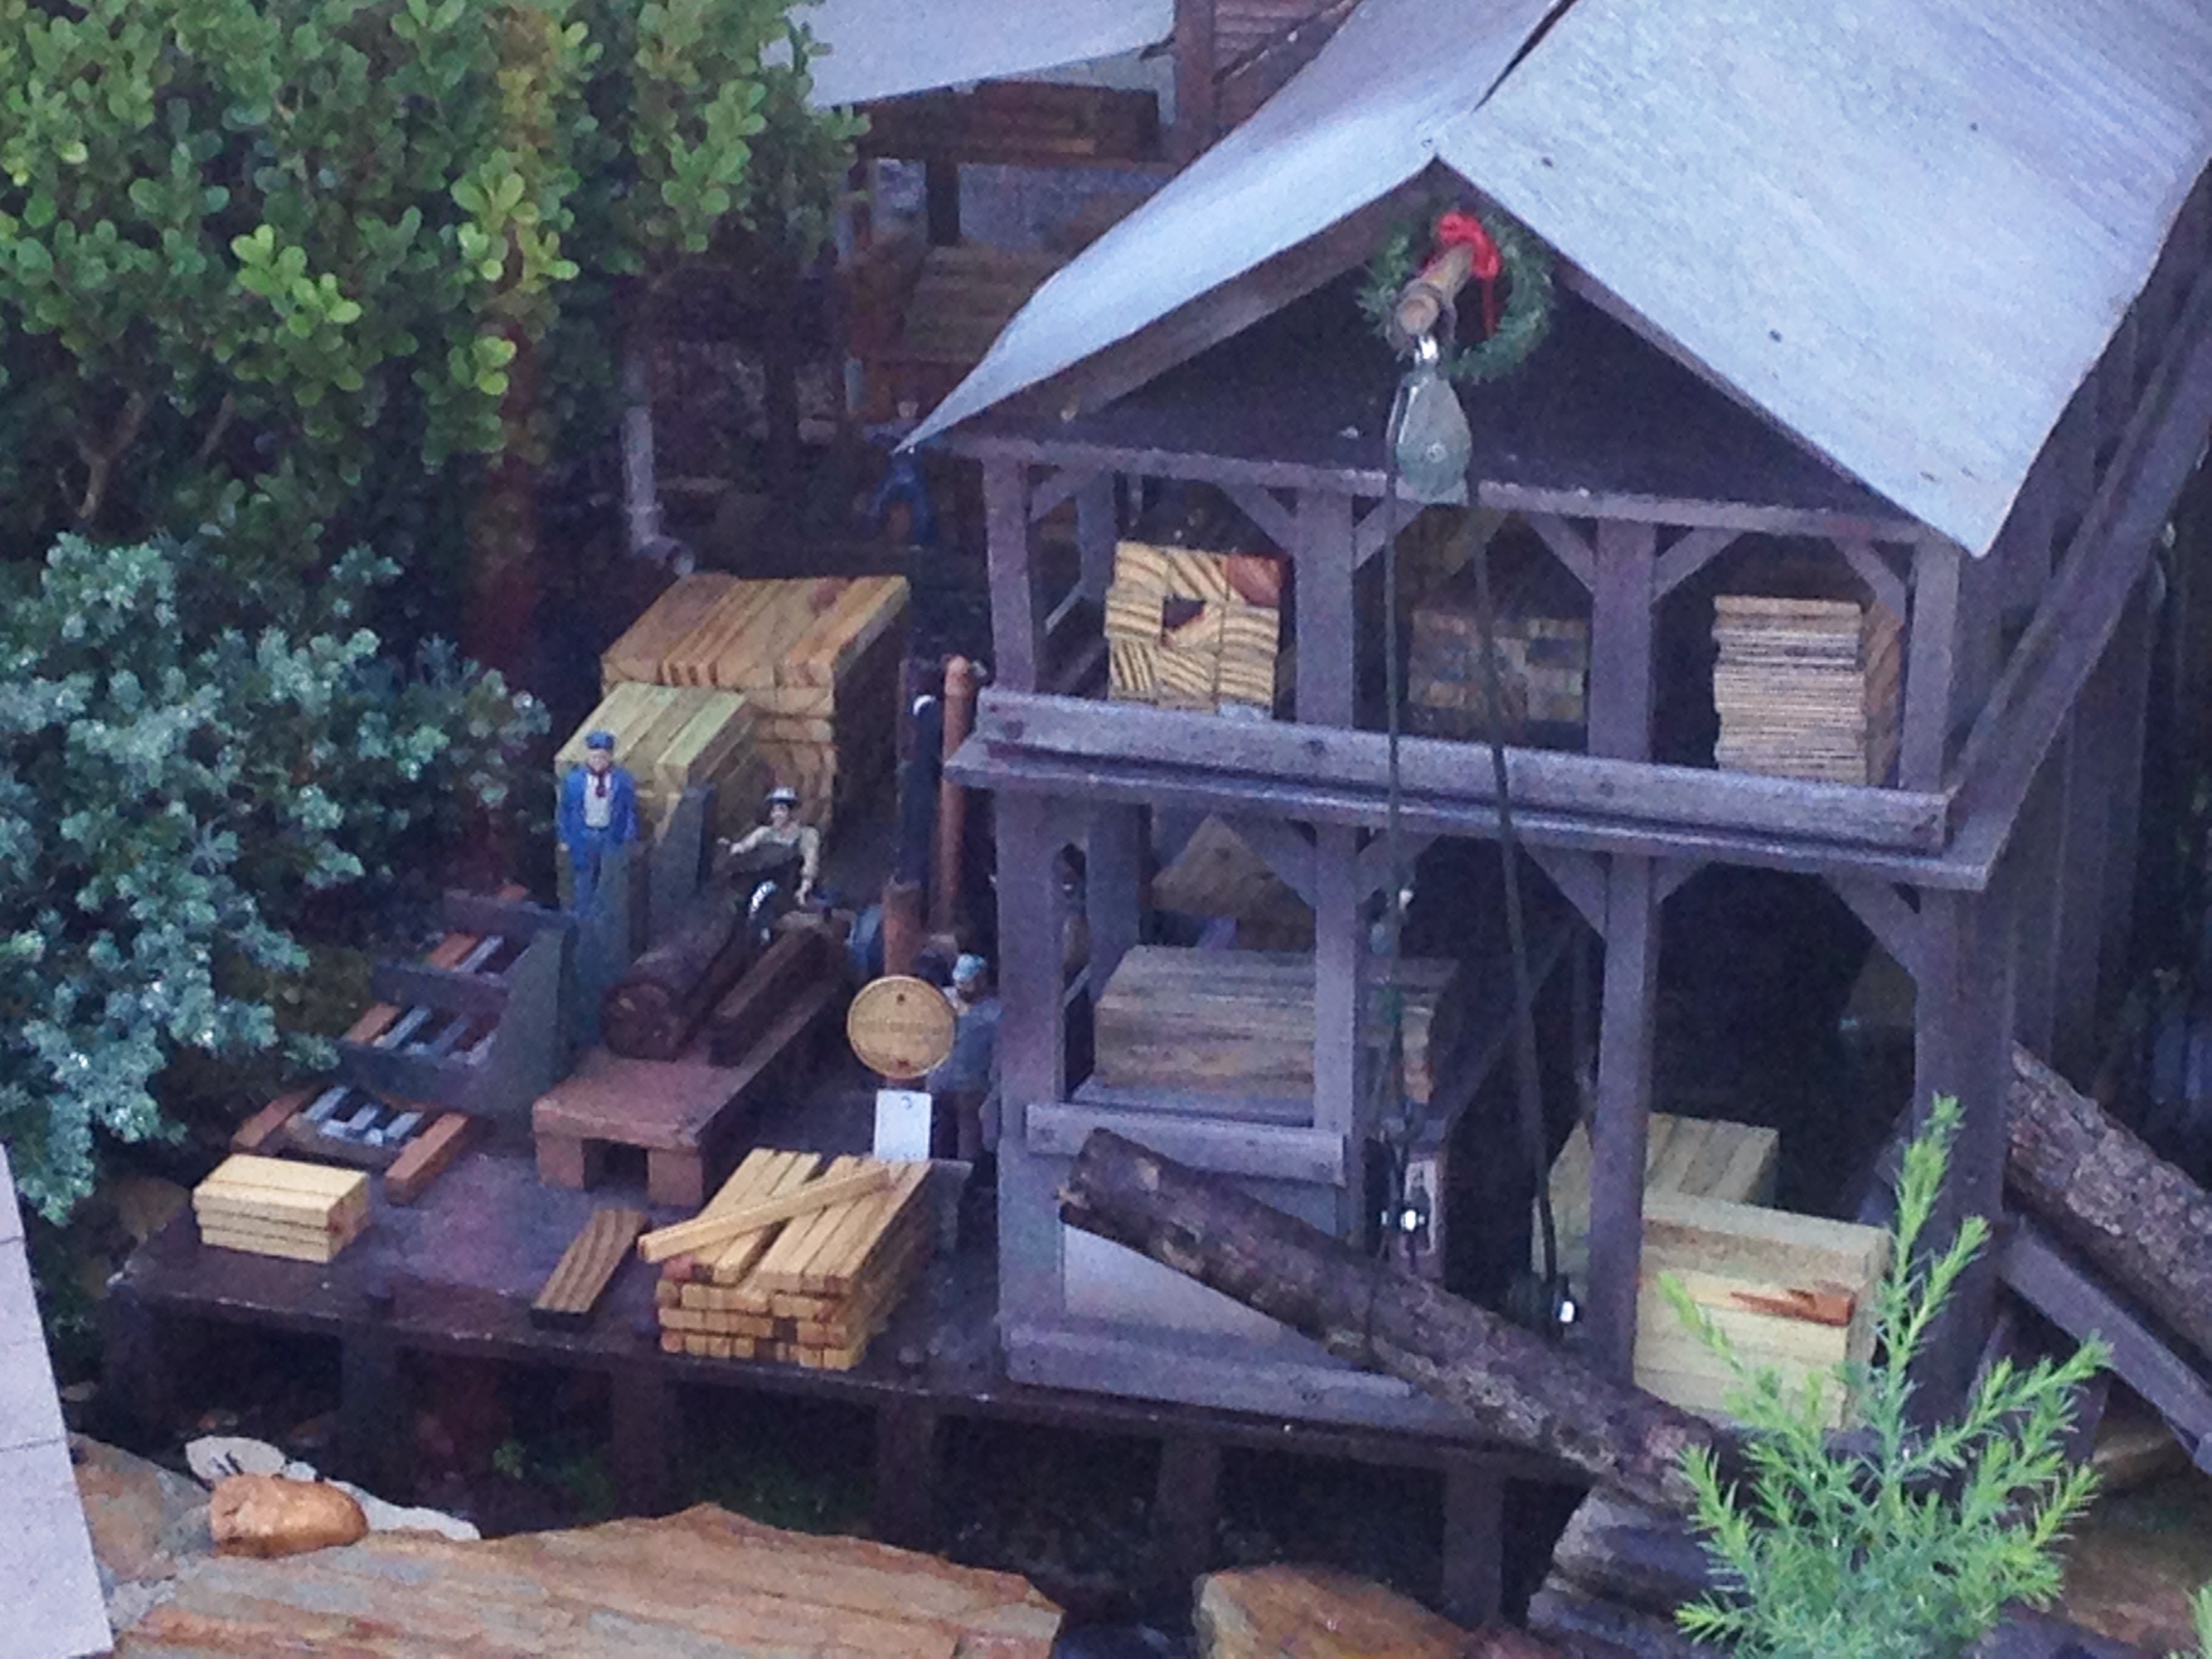
After getting the mill square and sound, it was time to add lumber and accessories to it to make it look more realistic.
Making a Steam Shovel:
One of the features at Centralia Garden Railroad is a rock mine. Limerock mining was just getting started in Hernando County in the early 1900s, so it has to be part of the layout as steam shovels were at that time part of every rock mine. So I’ve been looking for a steam shovel to go in the mine. Recently, there has been a steam shovel kit advertised in Garden Railways magazine. So I bought the kit, assembled and painted it and added a smoke machine to make it look more realistic.
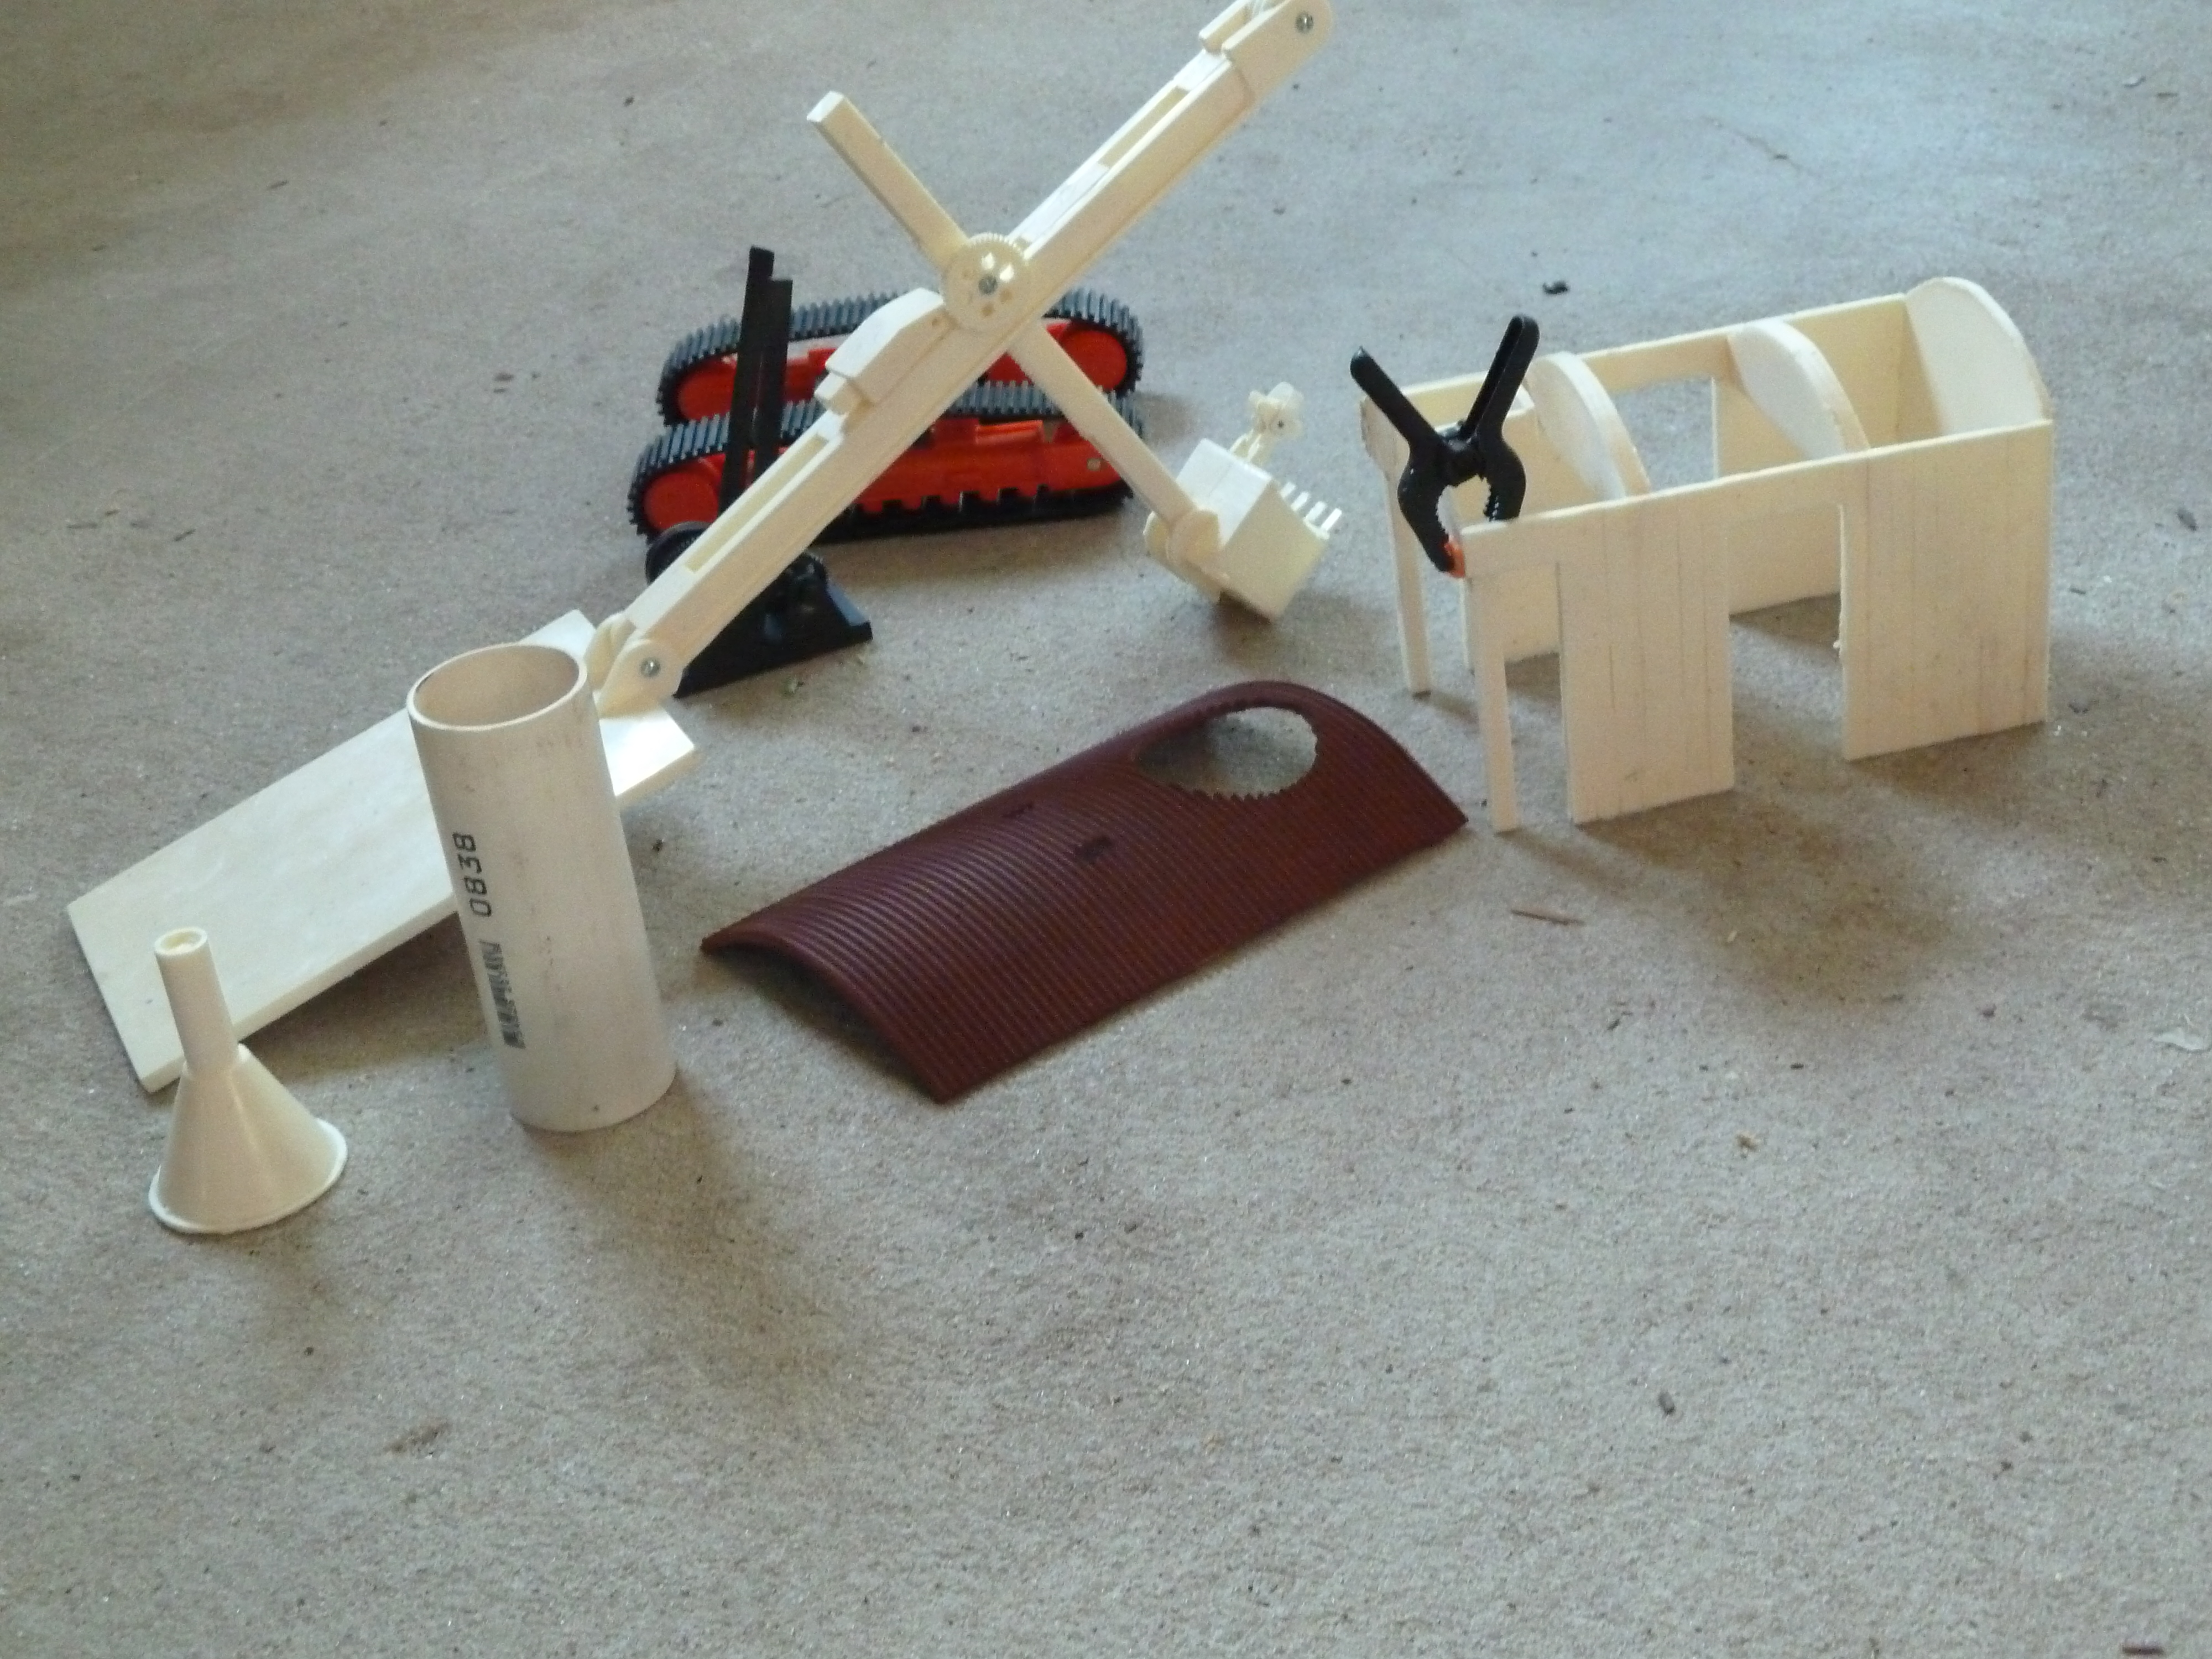
After removing the excessive molding plastic, the parts were ready for assembly. In order to make it look more realistic on the layout, I decided to add smoke. The cab of this model had just the right amount of space to add an Aristo-Craft smoke machine at the bottom of the boiler. Several modifications were needed since the modeling kit was not designed to be a working model, but part of the joy of this hobby is the challenge of turning something into something it was not intended to be. Currently, I am using a 9 volt battery to power the smoke generator, but my plan is to attach it to my track power supply which should generate a lot more smoke. Now you’ve got to look real hard to see the smoke rising from the smoke stack.
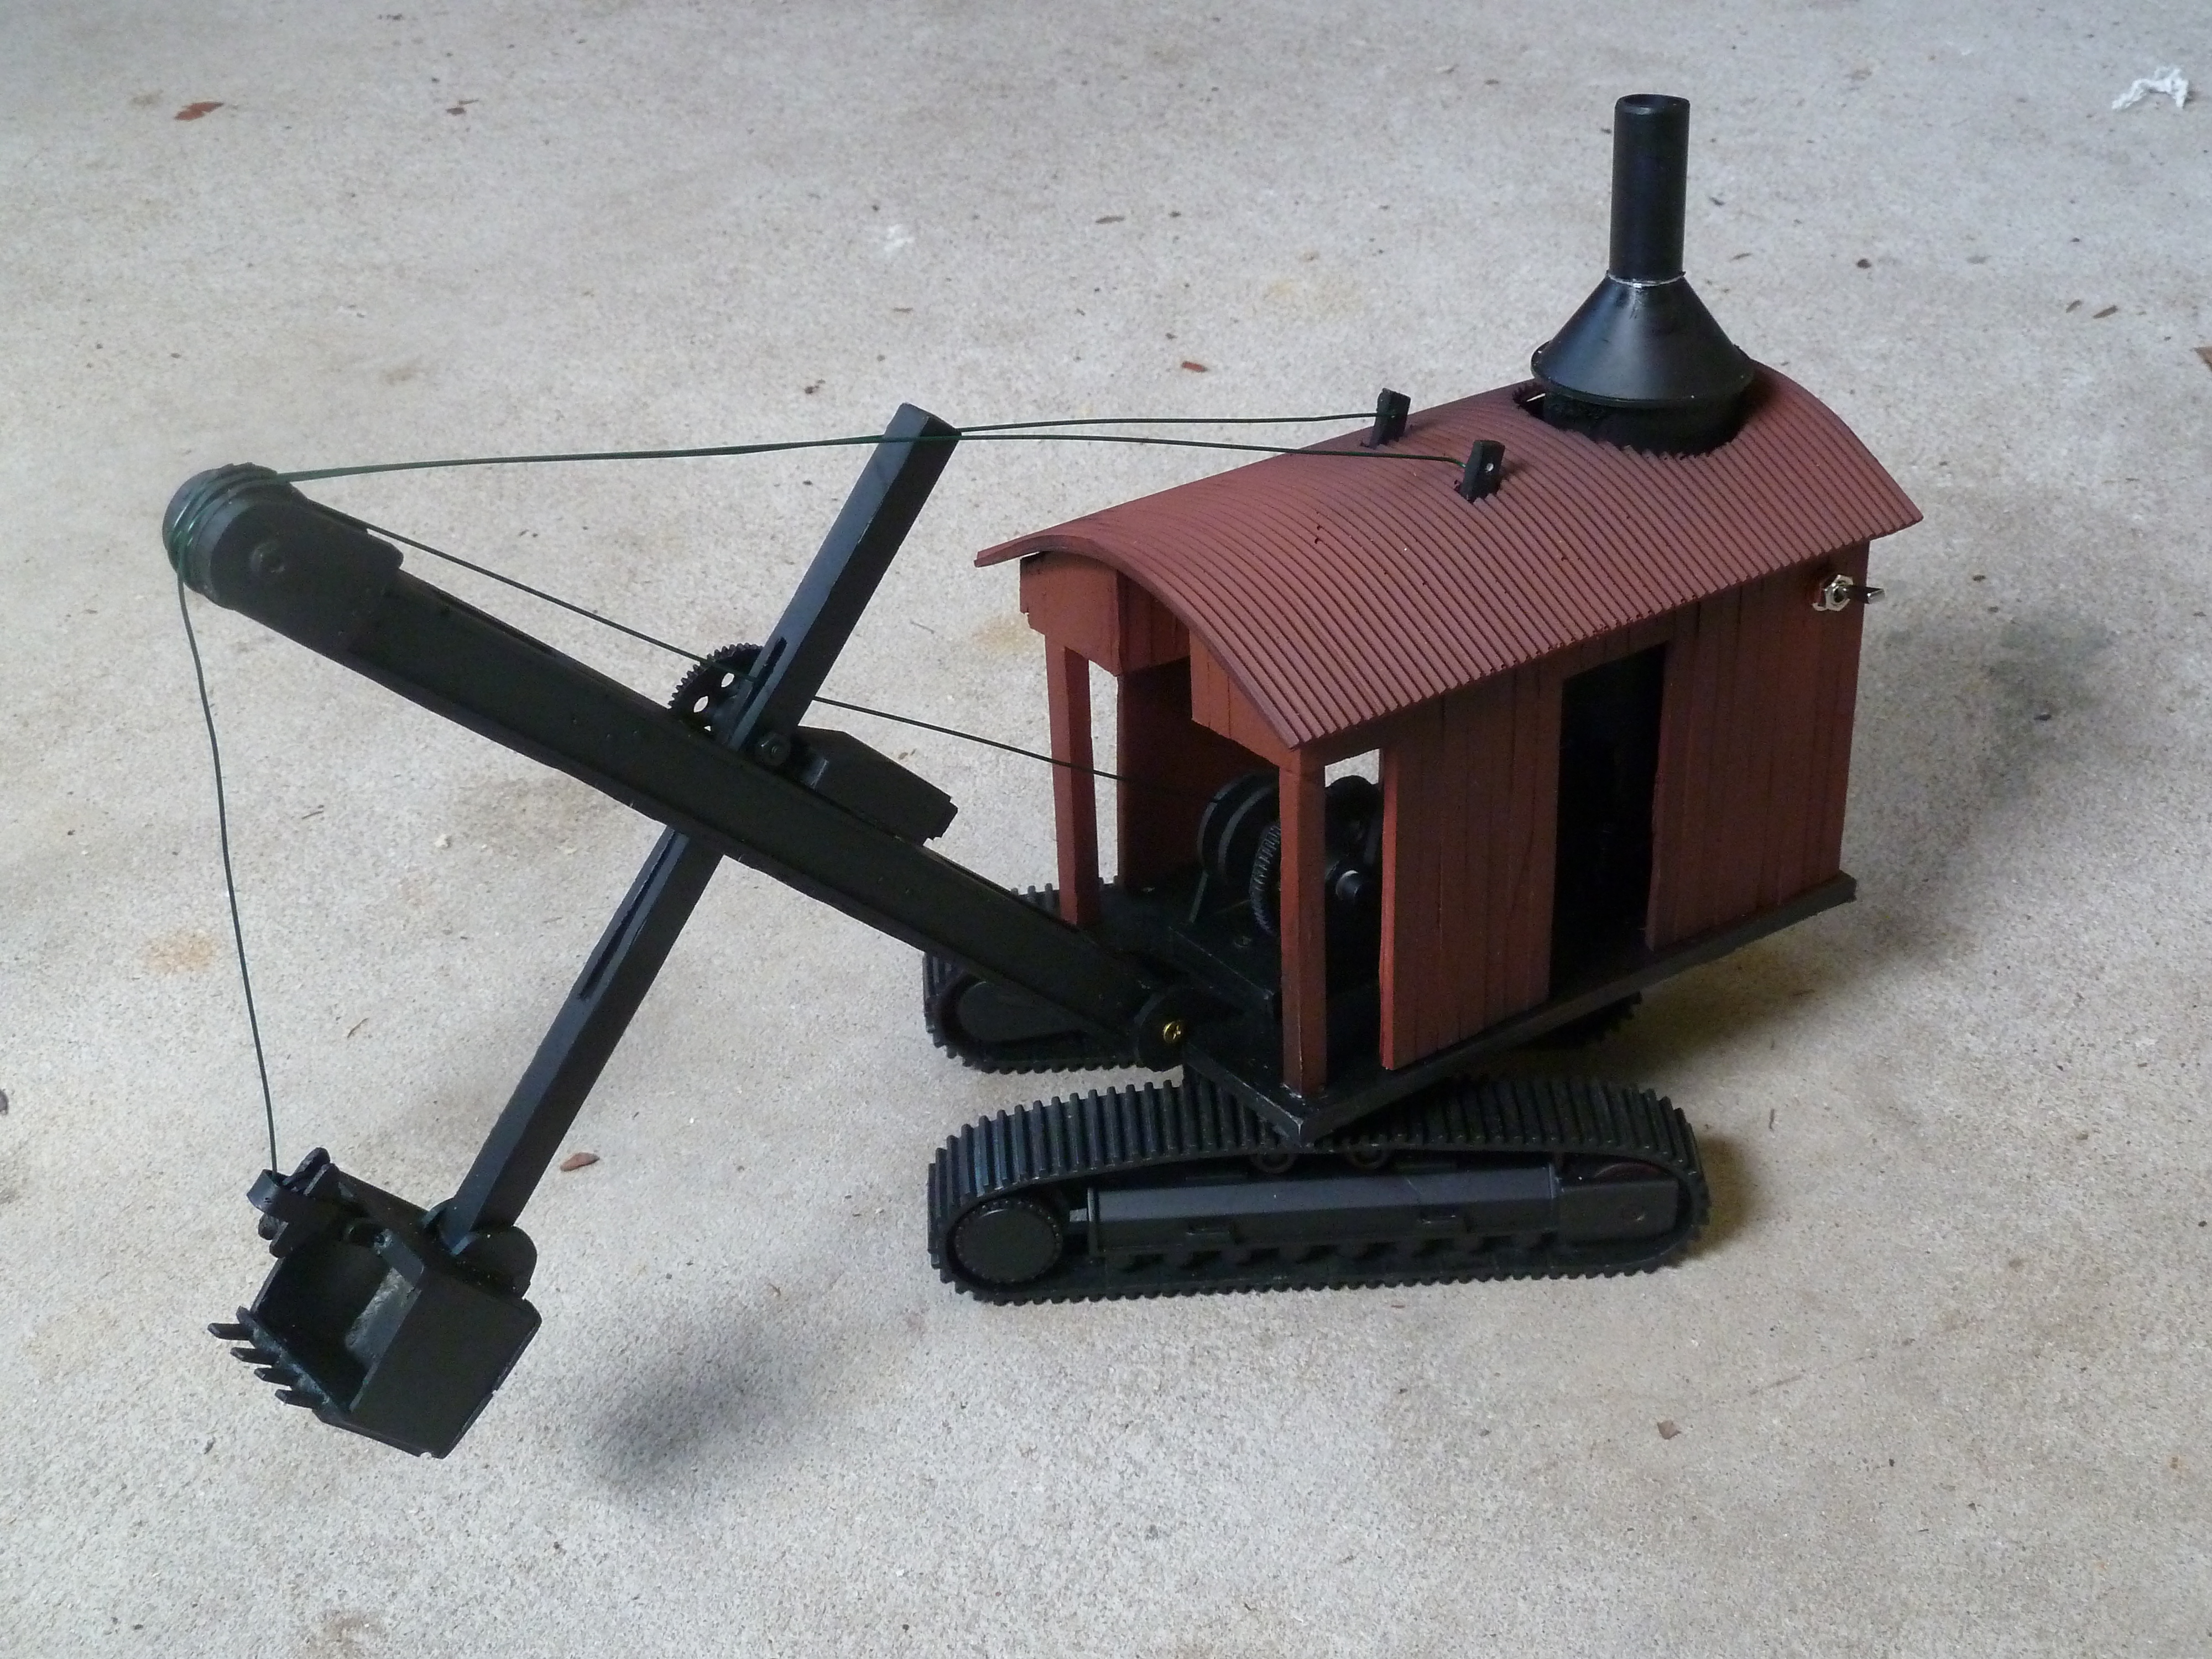
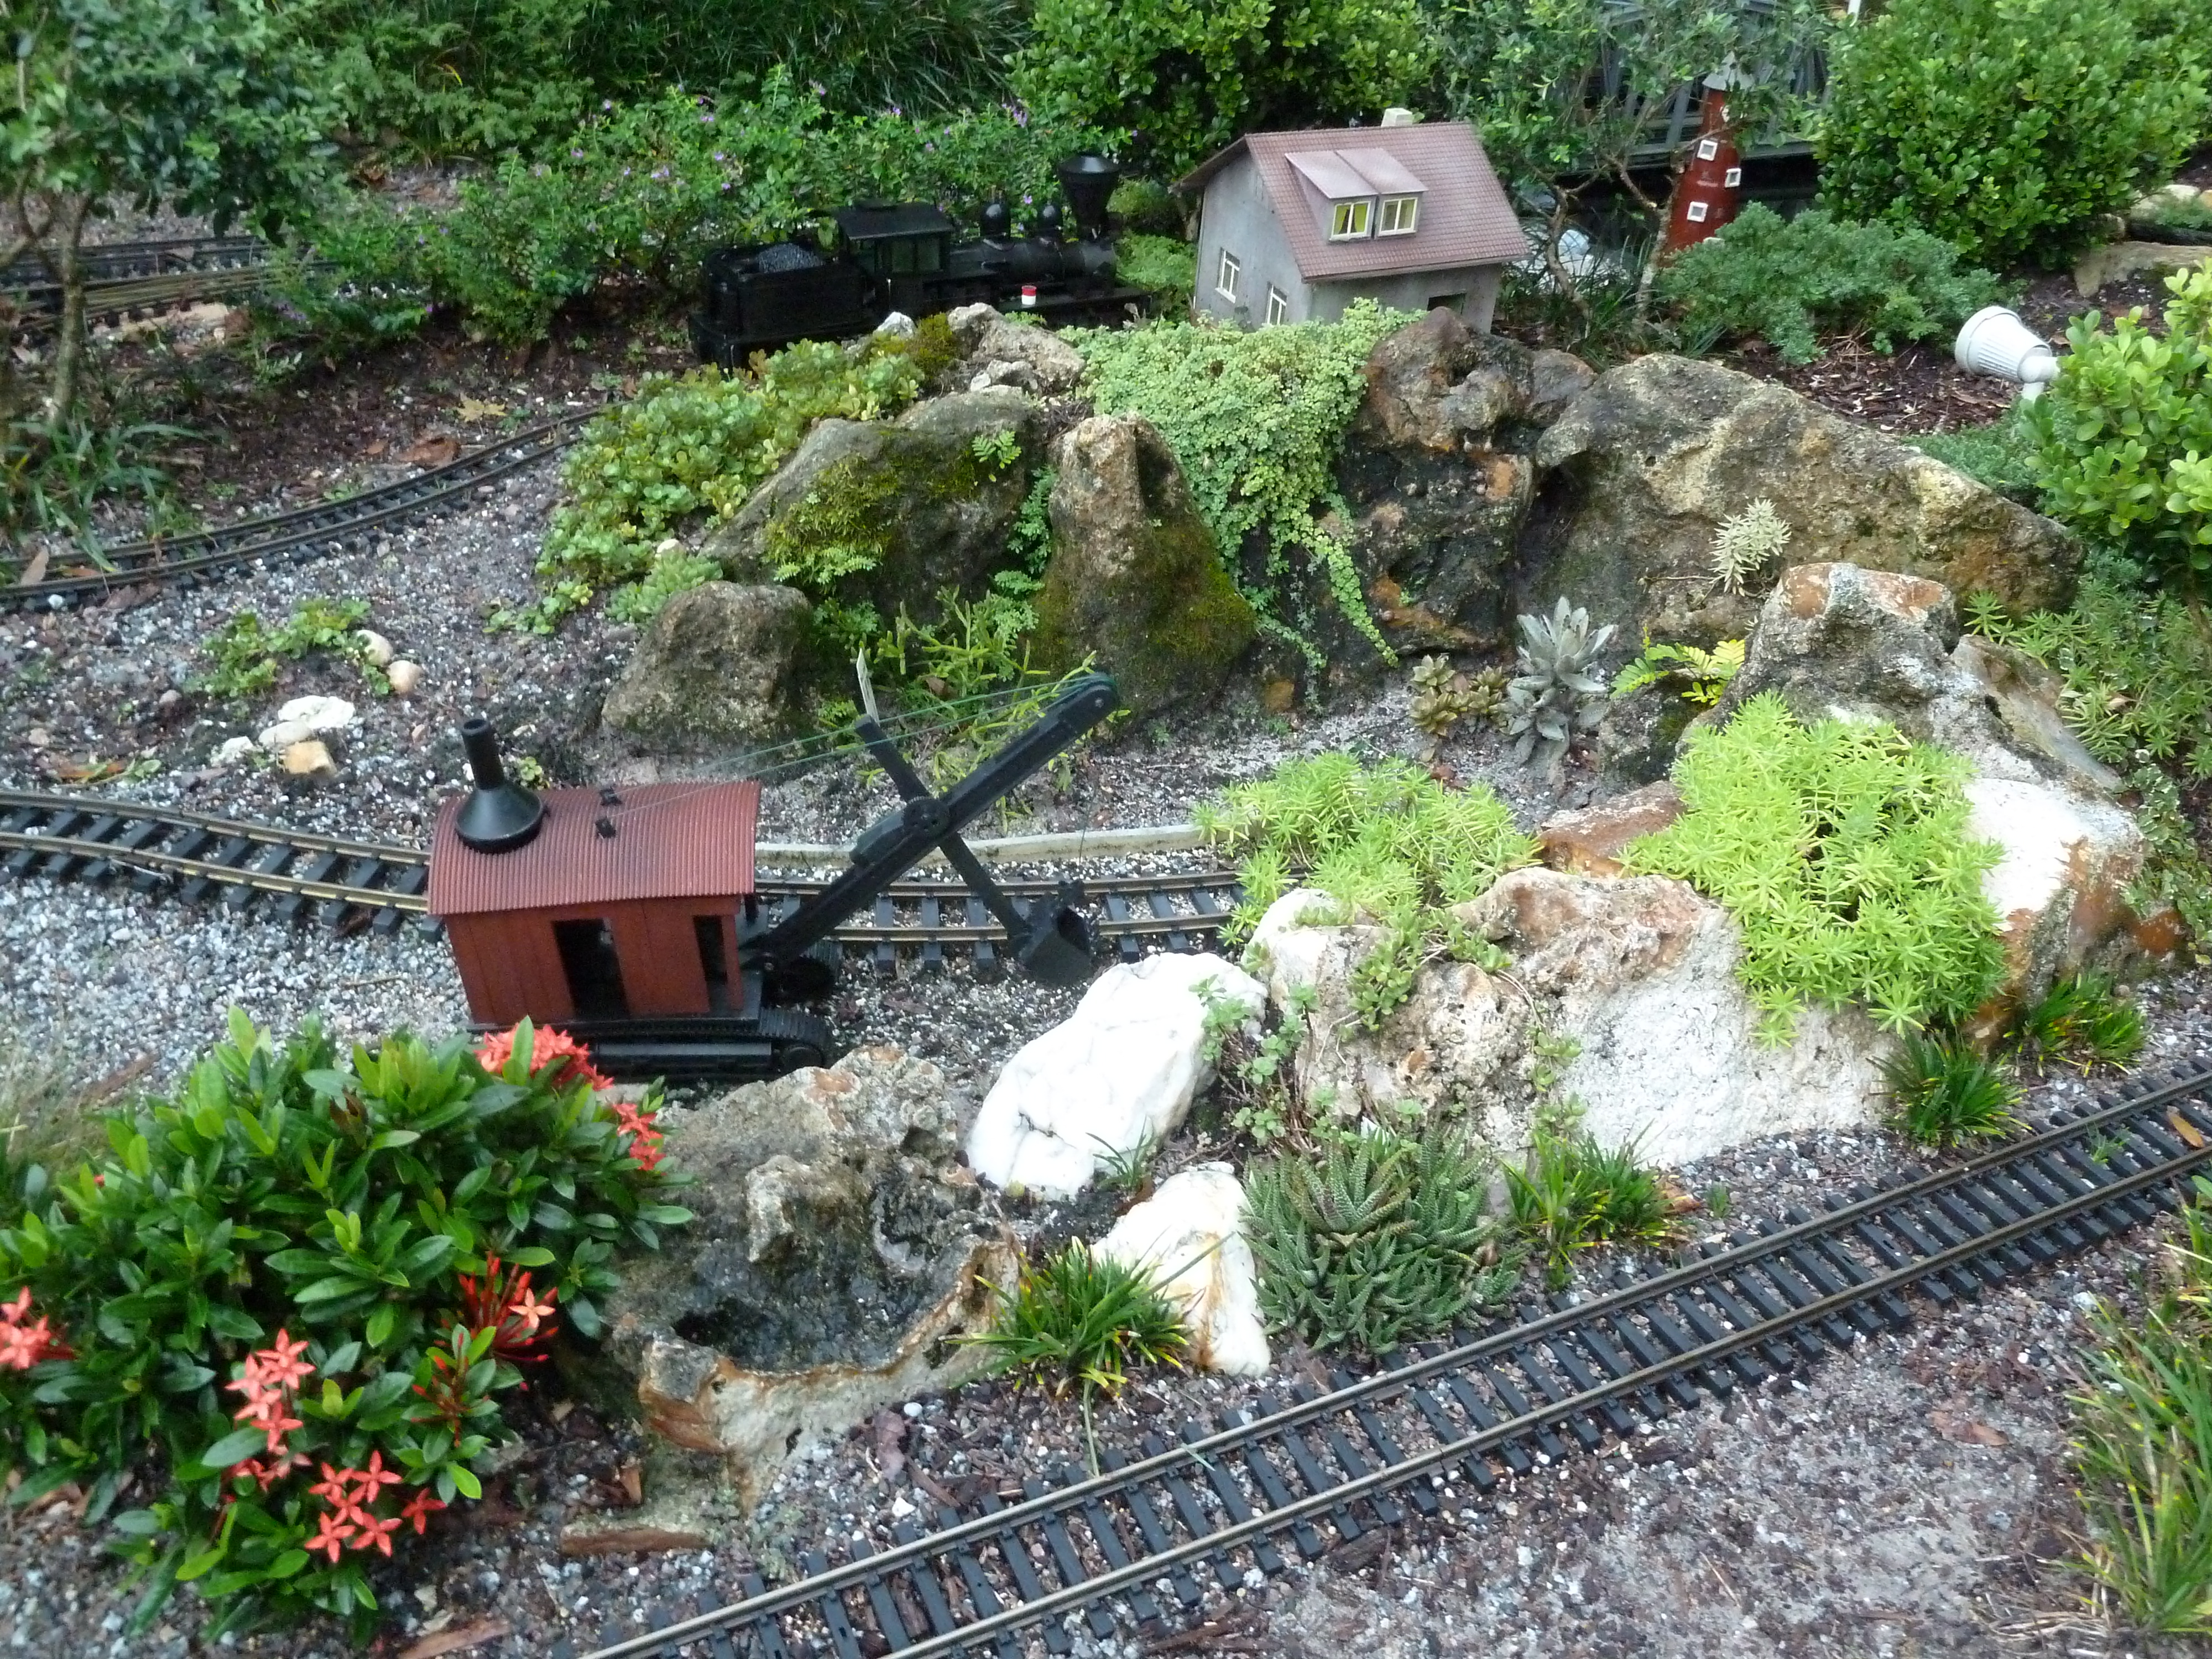
Below: With the steam shovel complete, it’s moved to the rock mine site on the layout of Centralia Garden Railroad. Oh, by the way, the rocks at this site are real Hernando County limerock rocks that I have gathered over the years for this project.
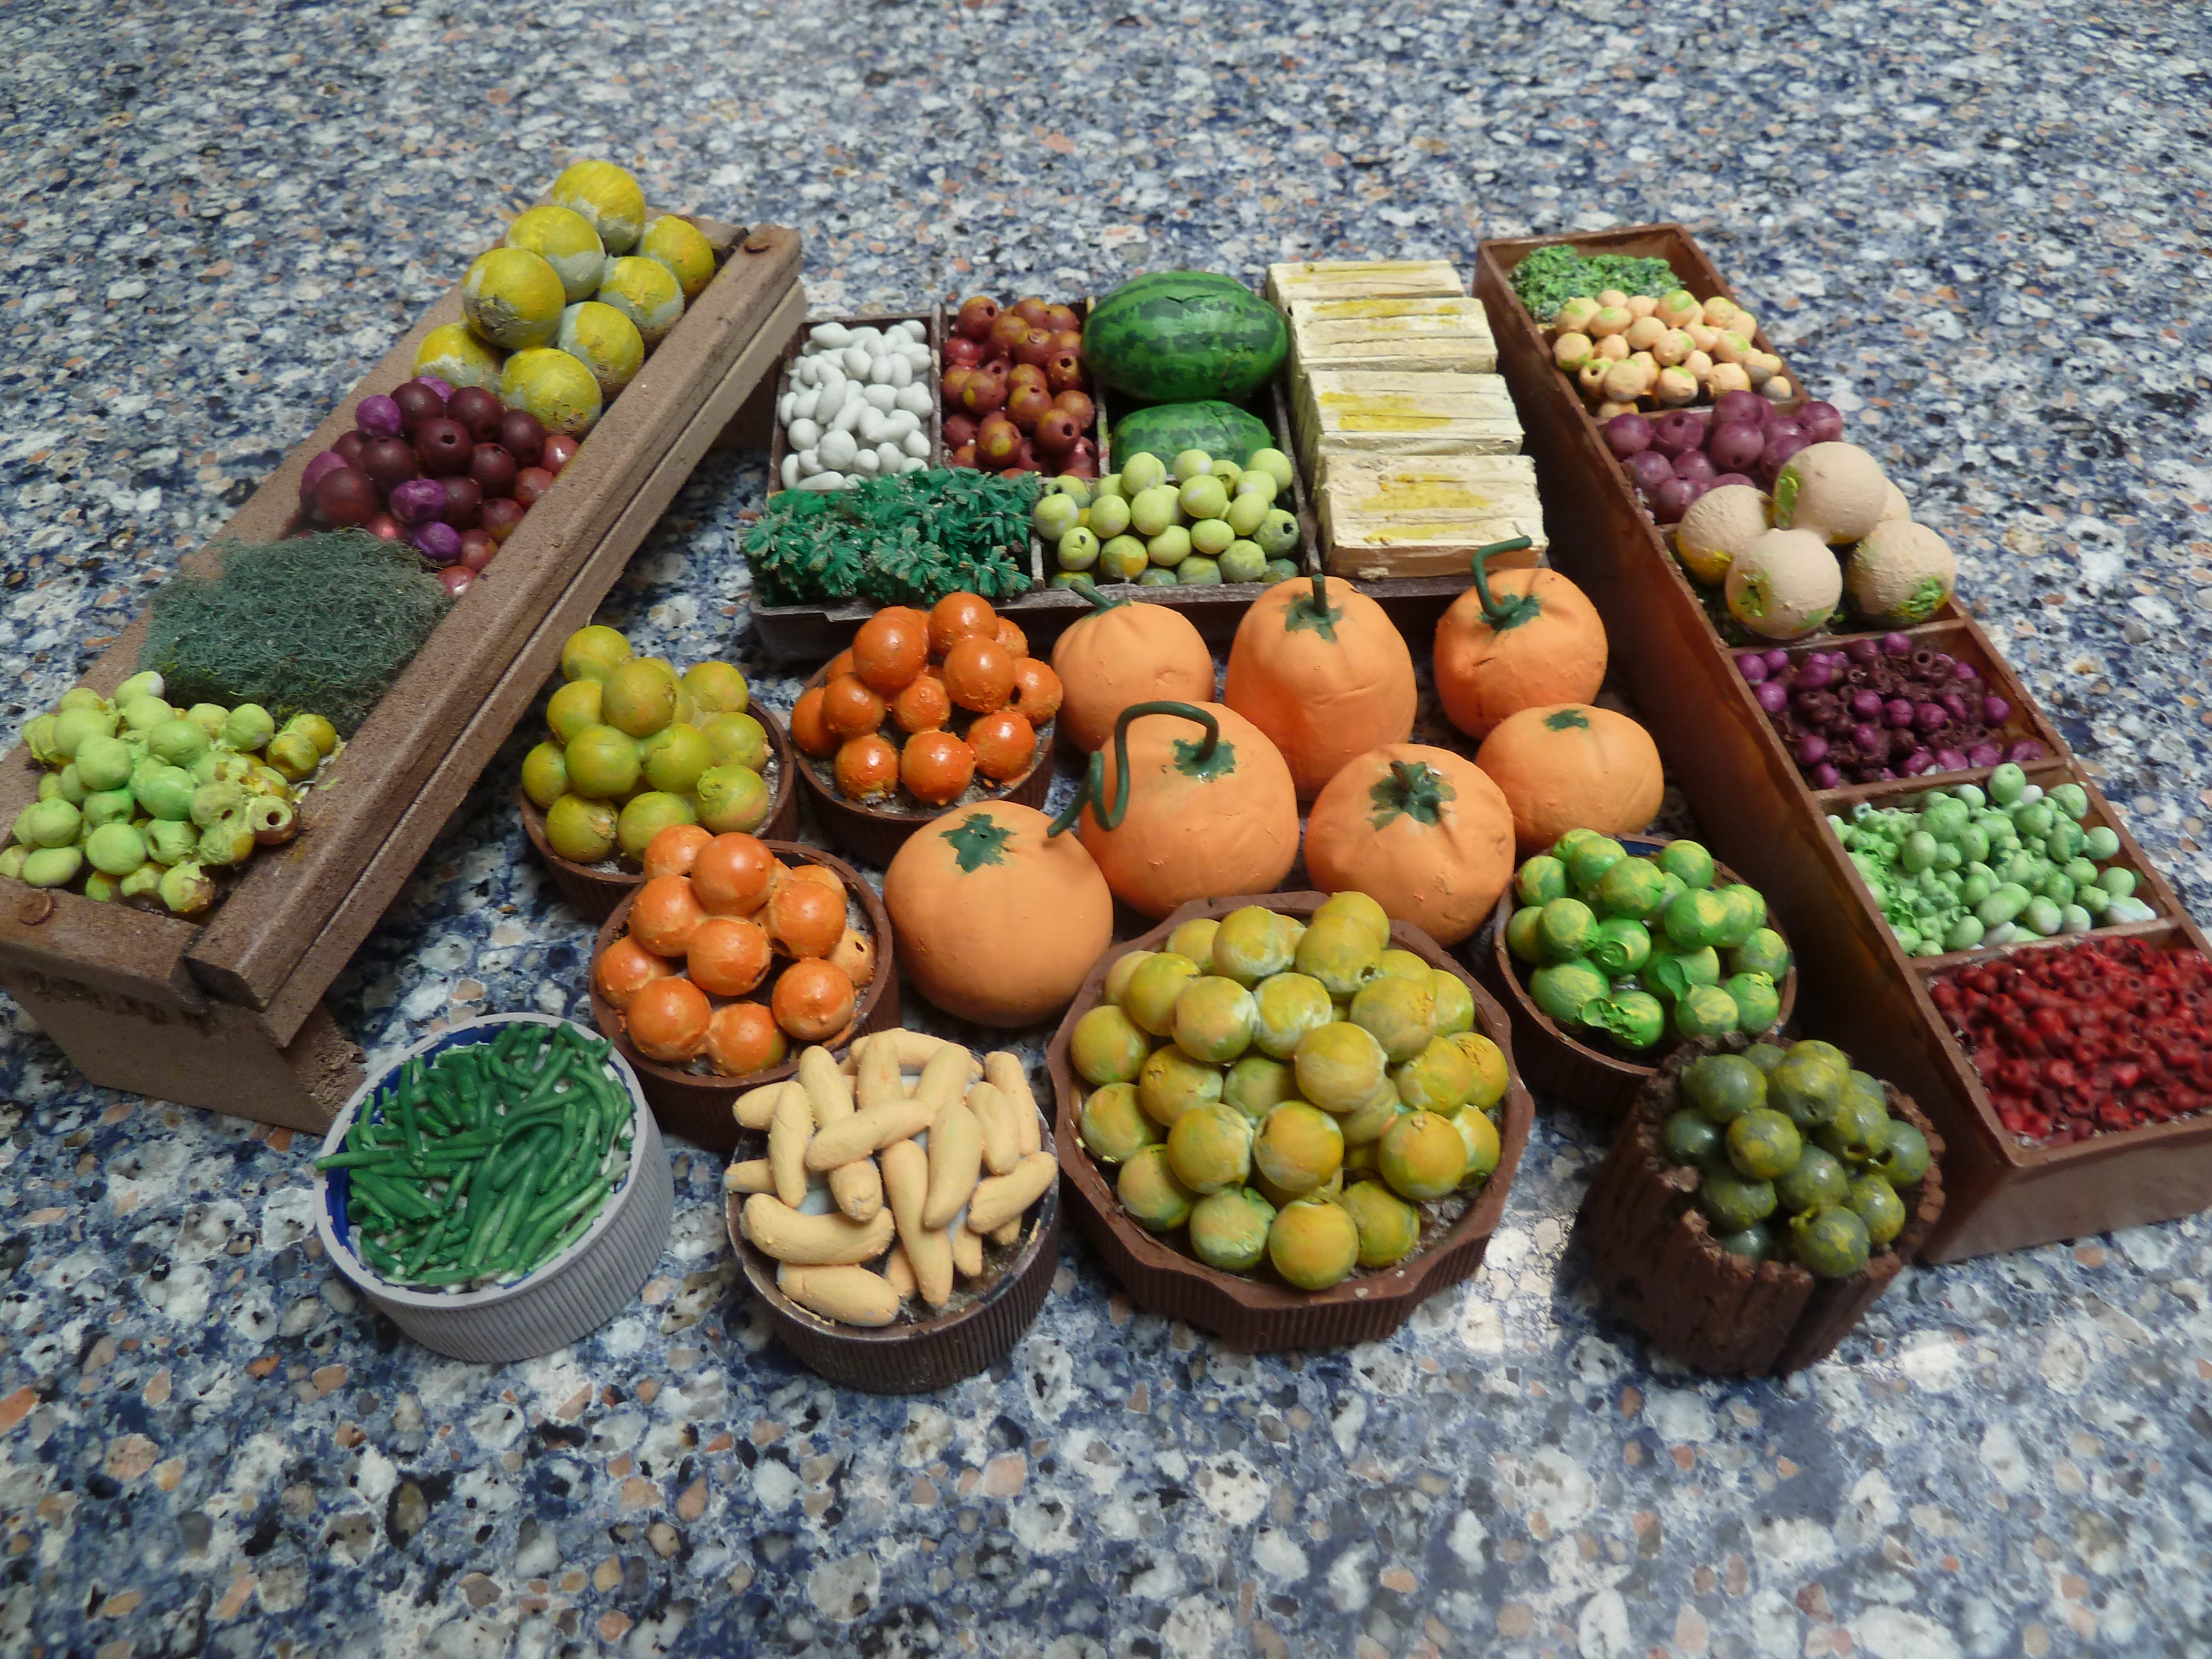
Refurbishing the Veggies:
After a couple years out in mid-Florida’s severe weather conditions, many of the figures and props need to be cleaned up. The fruit and vegetables look pretty sad.
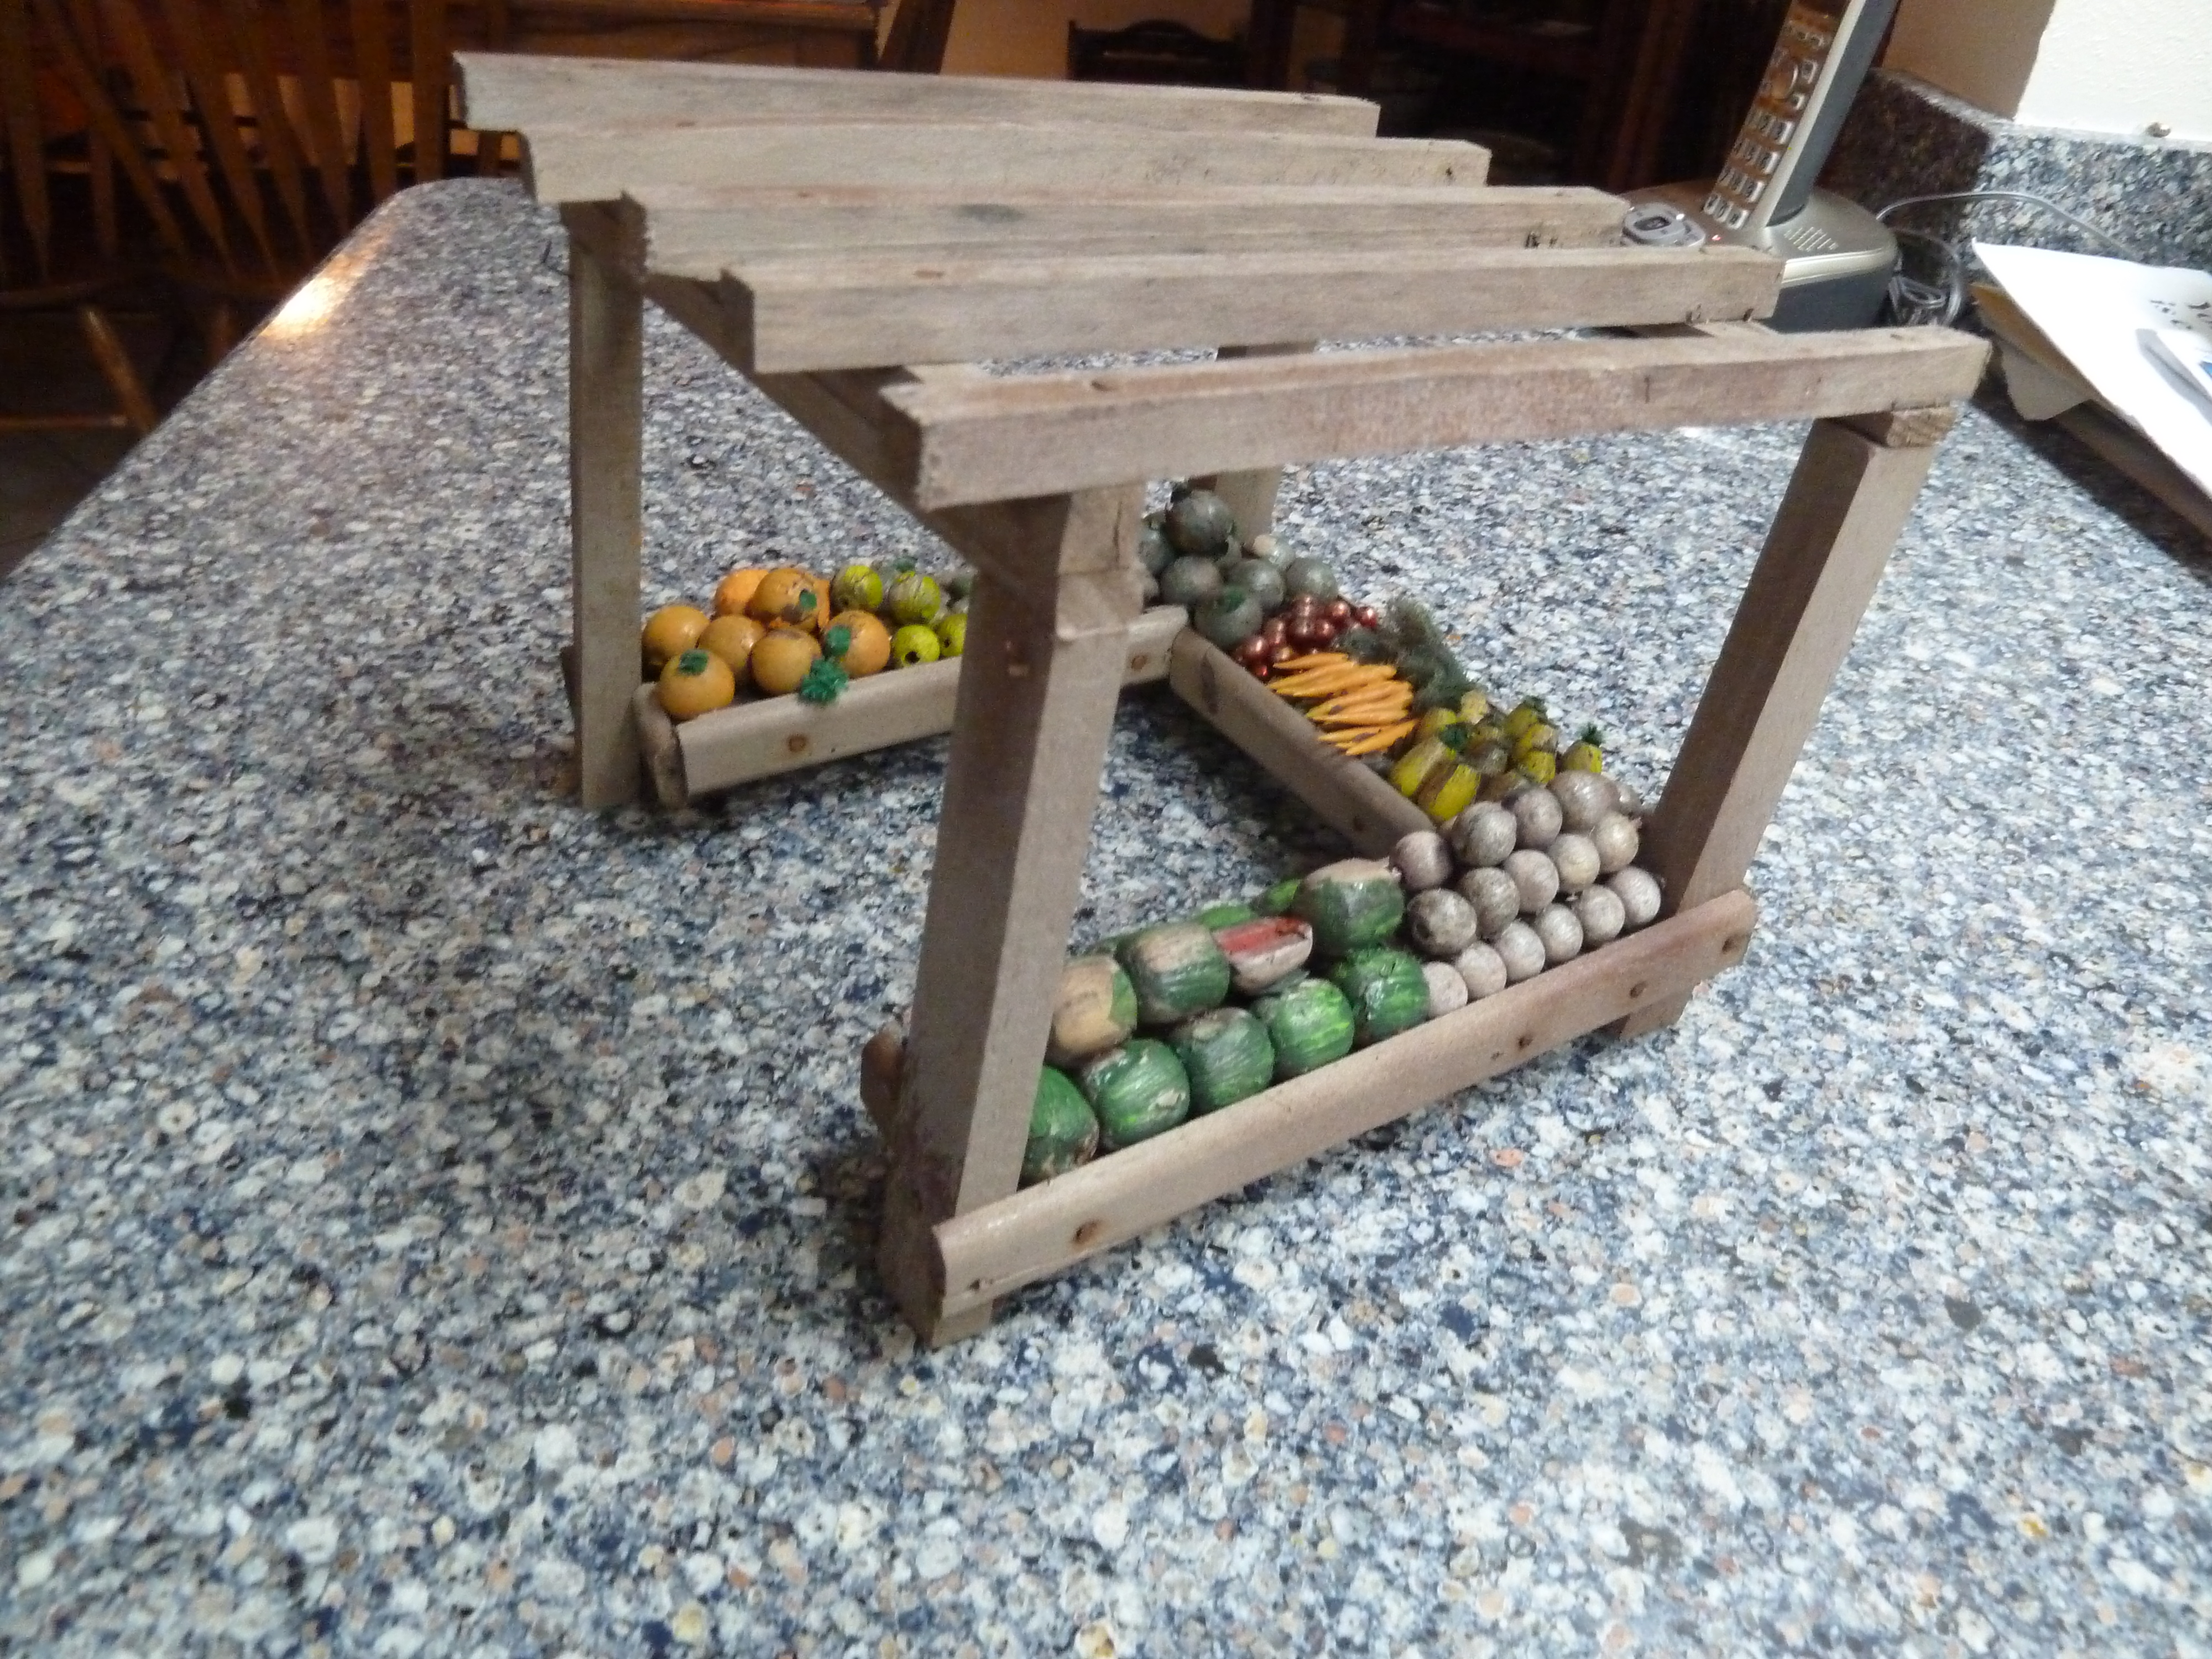
So, after scraping off old paint, glue, and debris from being outside, the fruit and vegetables on the roadside stand needed a fresh coat of paint. The fruit and vegetables were originally made from various sizes of beads or made from Magic-Sculpt, which is a clay-like material that is used in taxidermy. This epoxy material can be molded into any shape and is practically indestructible. In the photos below, many of the fruit and vegetables are made using this material. 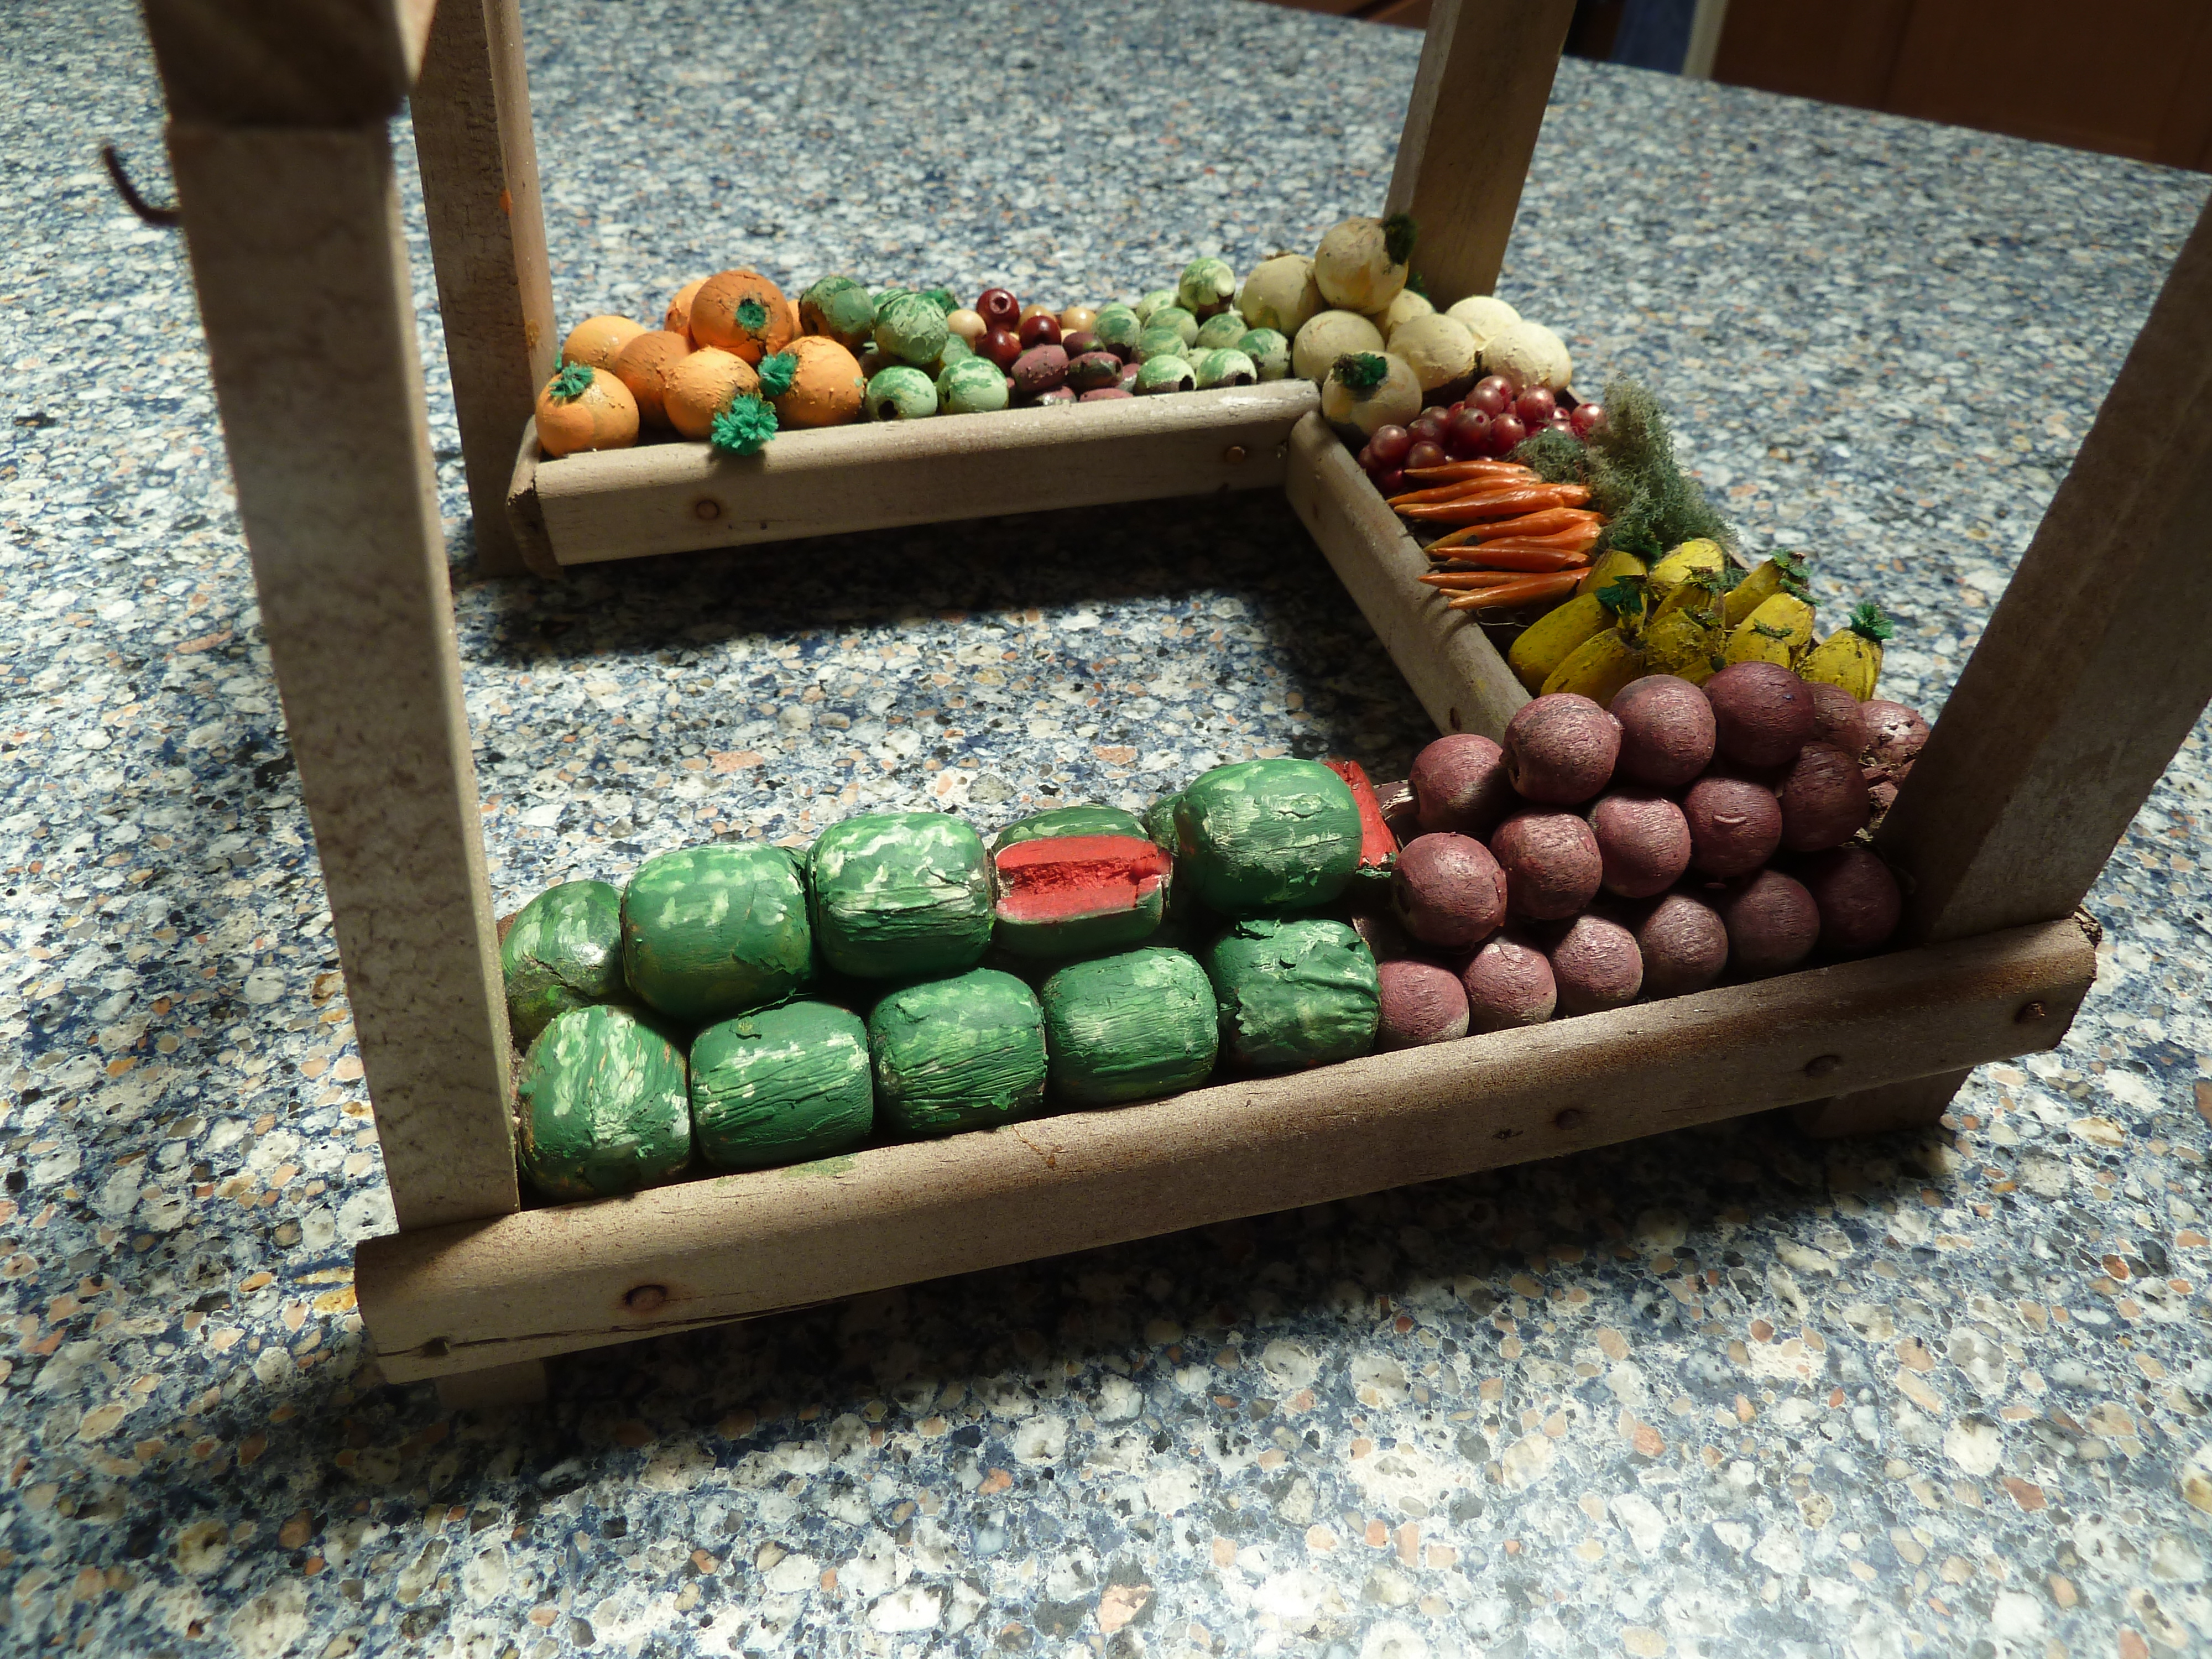
The containers holding the fruit are bottle caps and a couple of other containers are pillboxes.
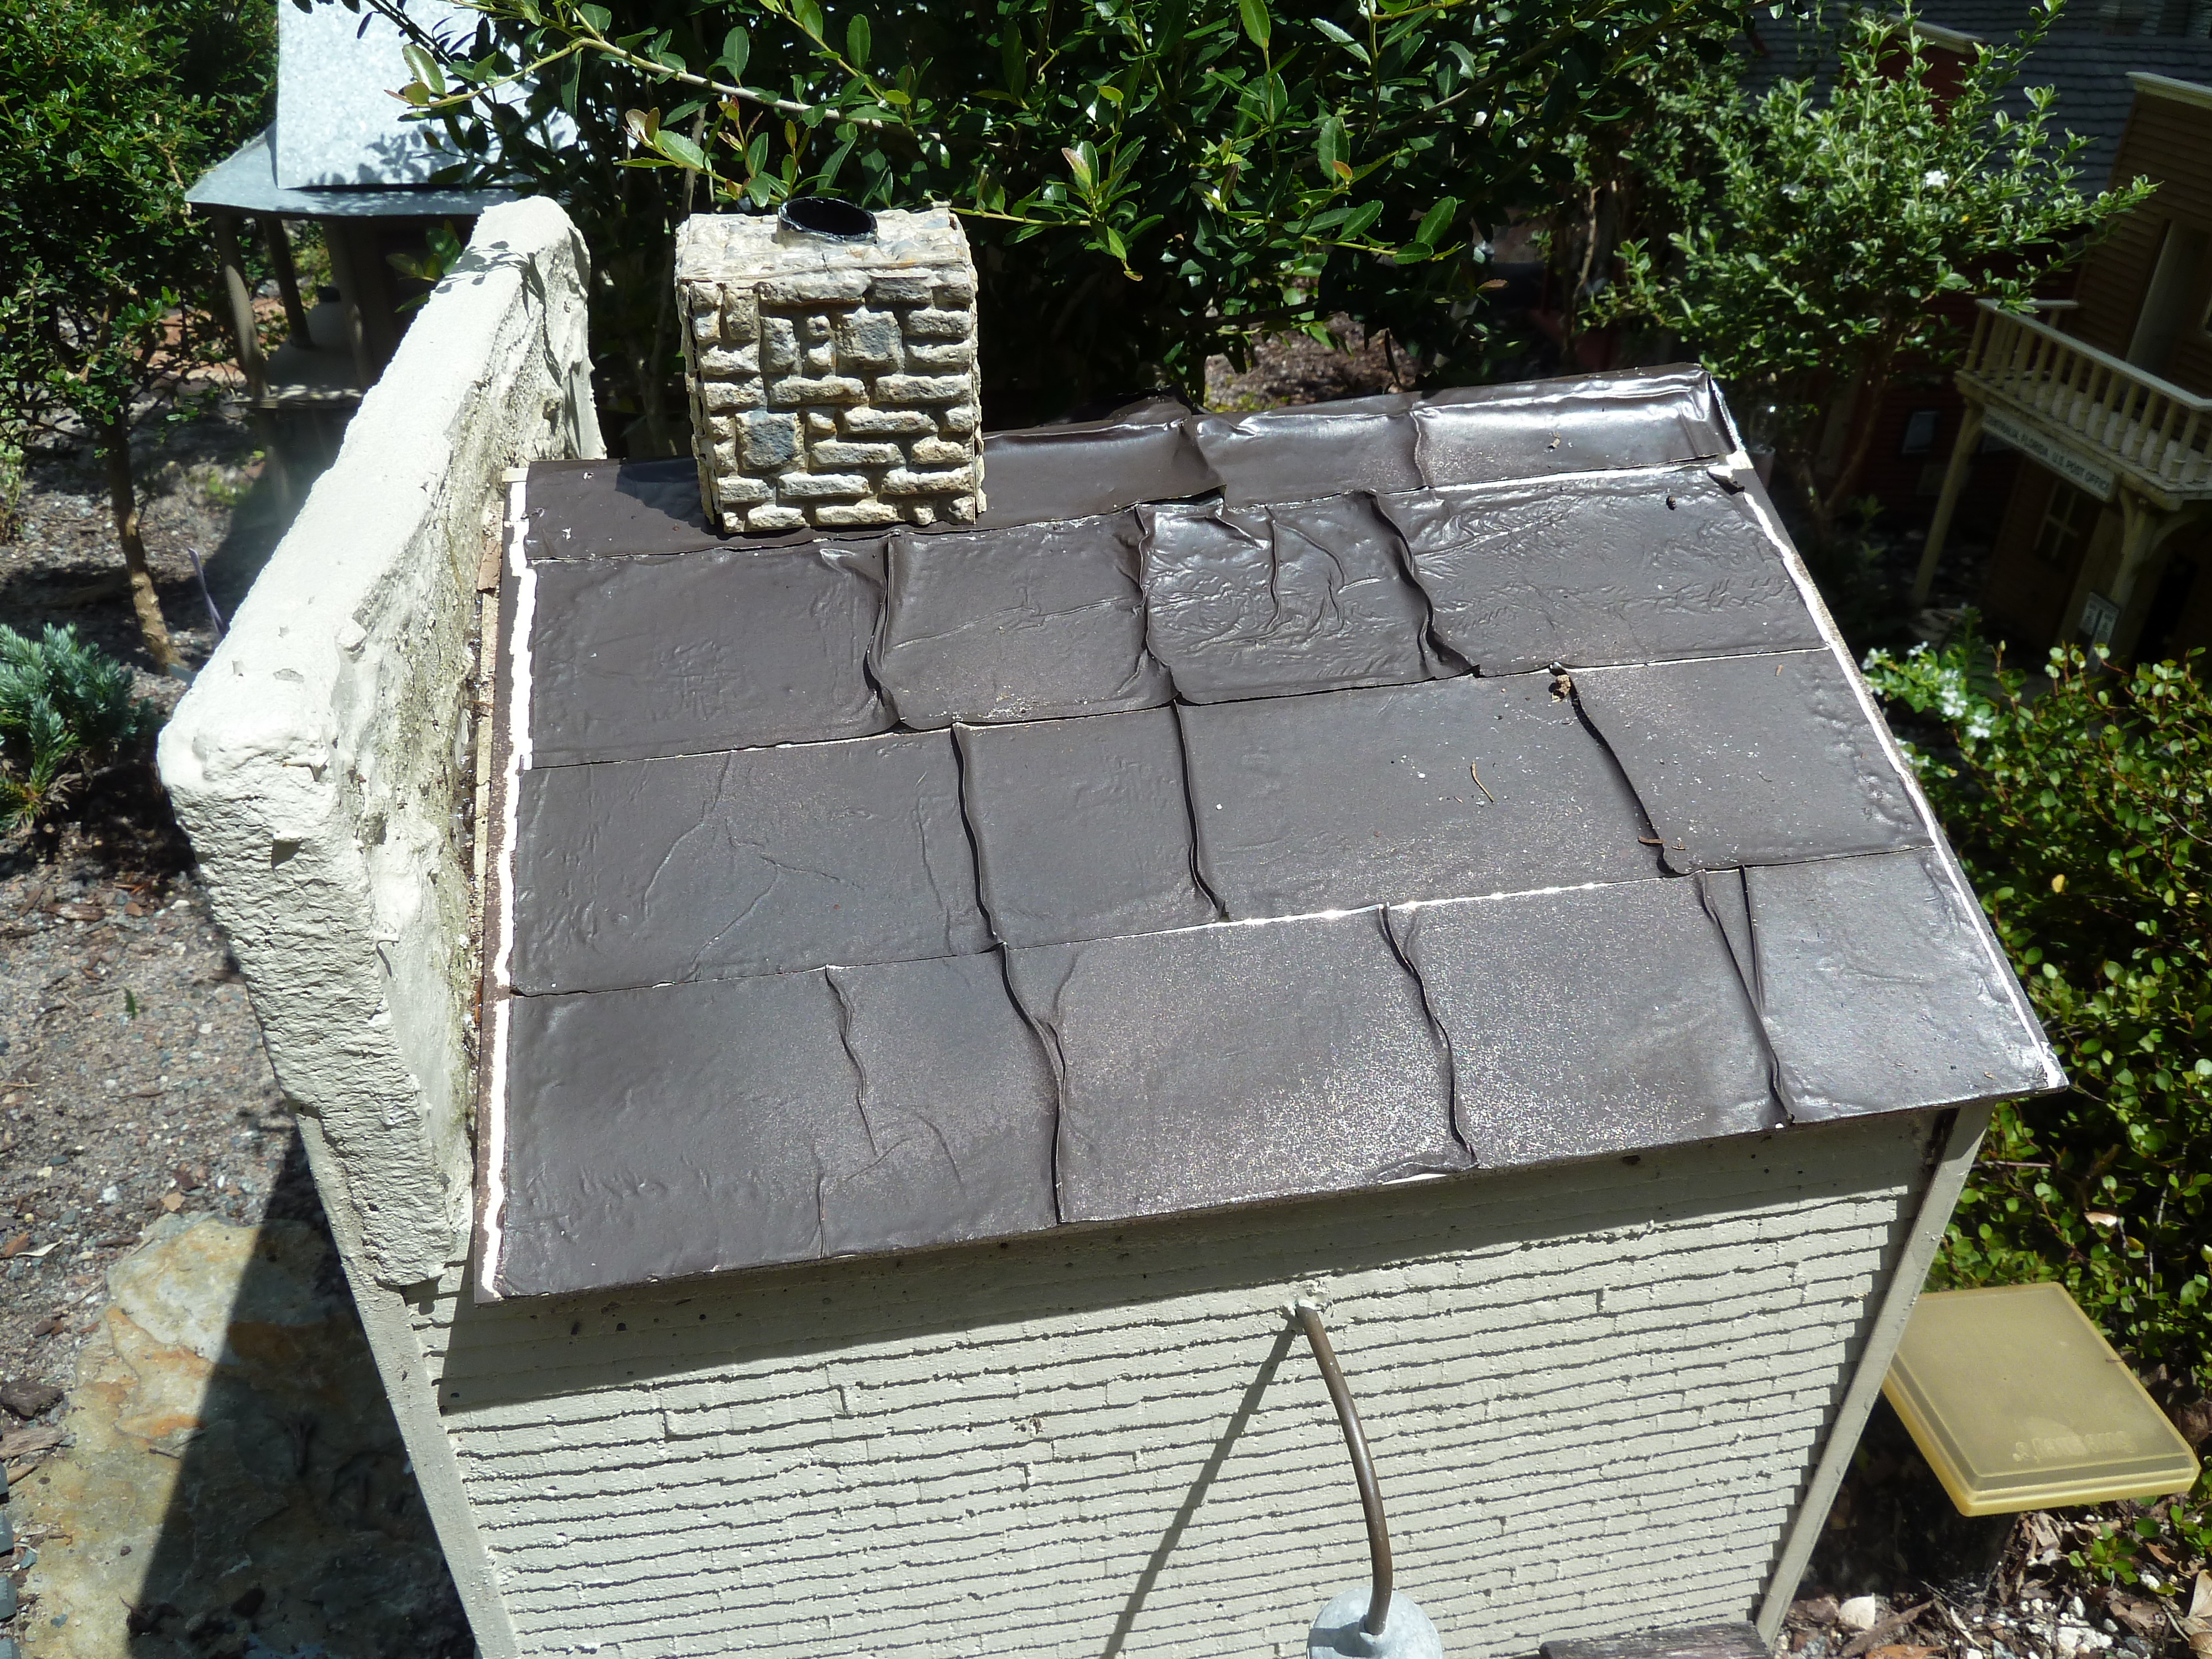
Making corrugated roofing/siding:
The Commissary that I made over a year ago is in dire need of a new roof. After reading about making corrugated galvanized roofing in the Garden Railways Magazine, I decided I would attempt to make my own roofing using the method as described in the magazine.
Before I show you how to make the roofing/siding, here is a photo of the Commissary building prior to getting a new roof:

- Old roofing material
This roof was made from the metal duck tape applied to plastic sheeting, then painted. Within a few days, it started to get the folds and creases, which has an interesting look, but not really what I was looking for.
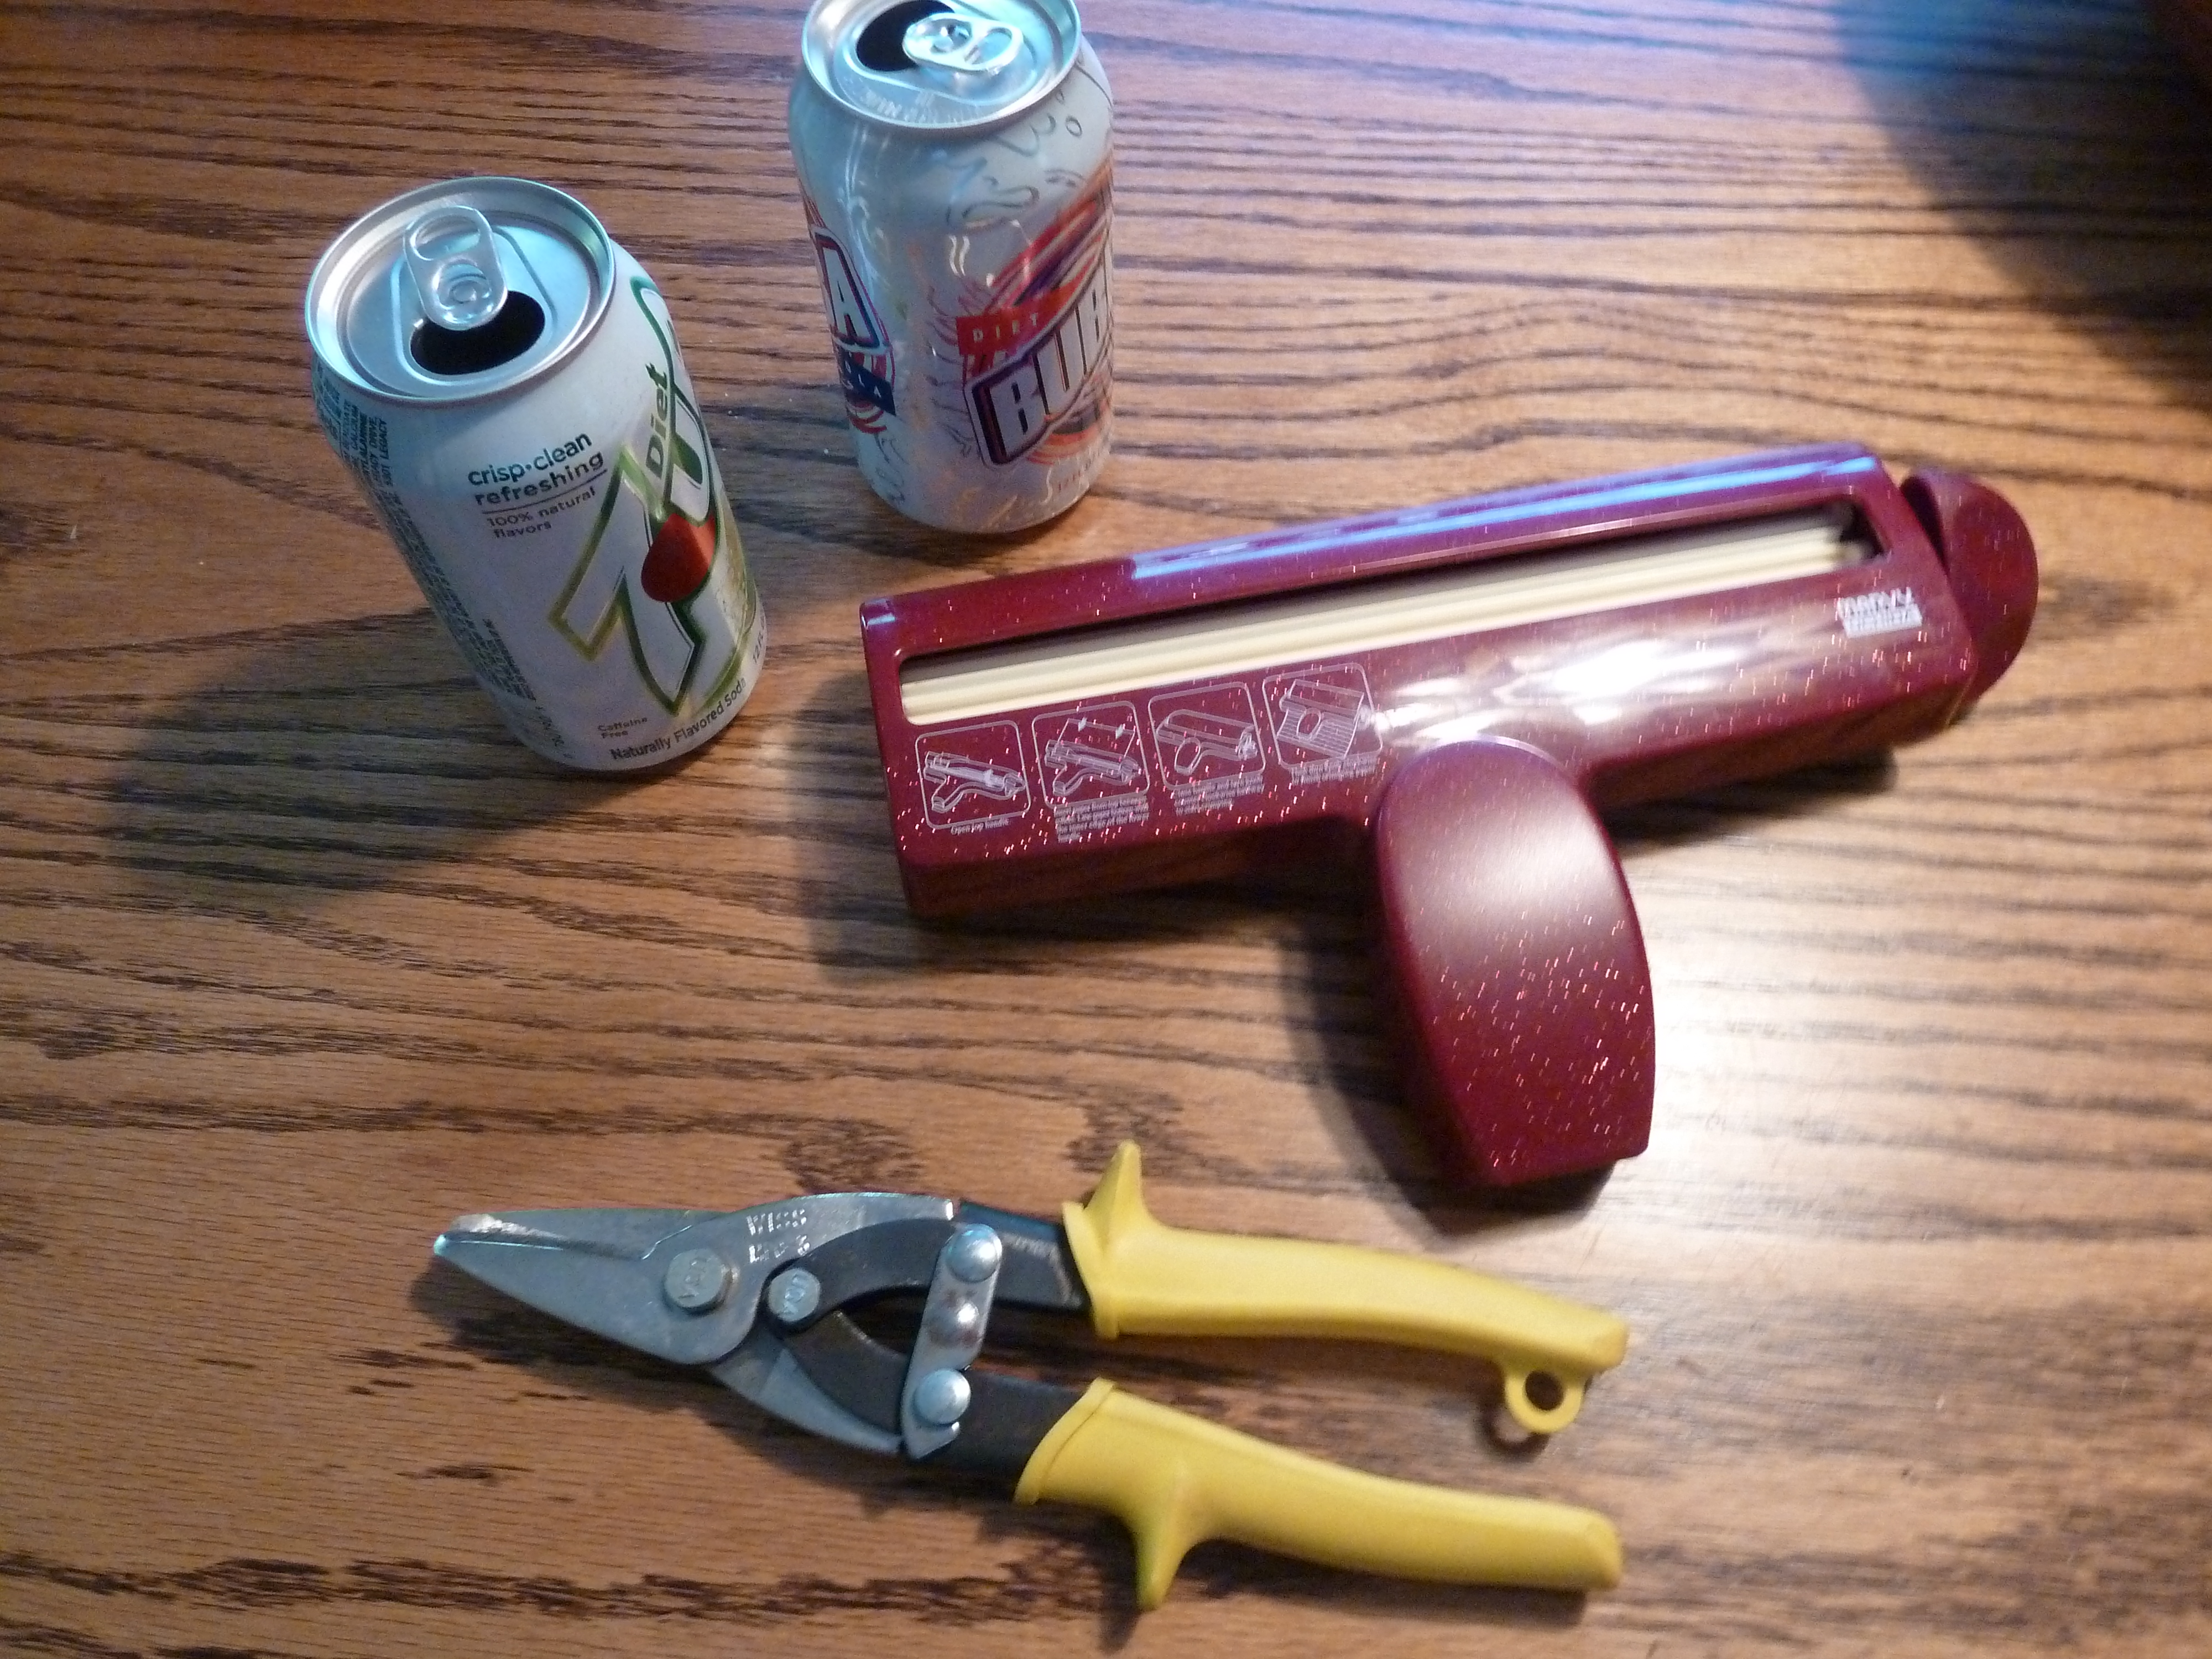
The tools that are needed for making metal corrugated roofing are: empty soda cans, sheet metal shears, and a paper crimper which I discovered is used in scrap booking.
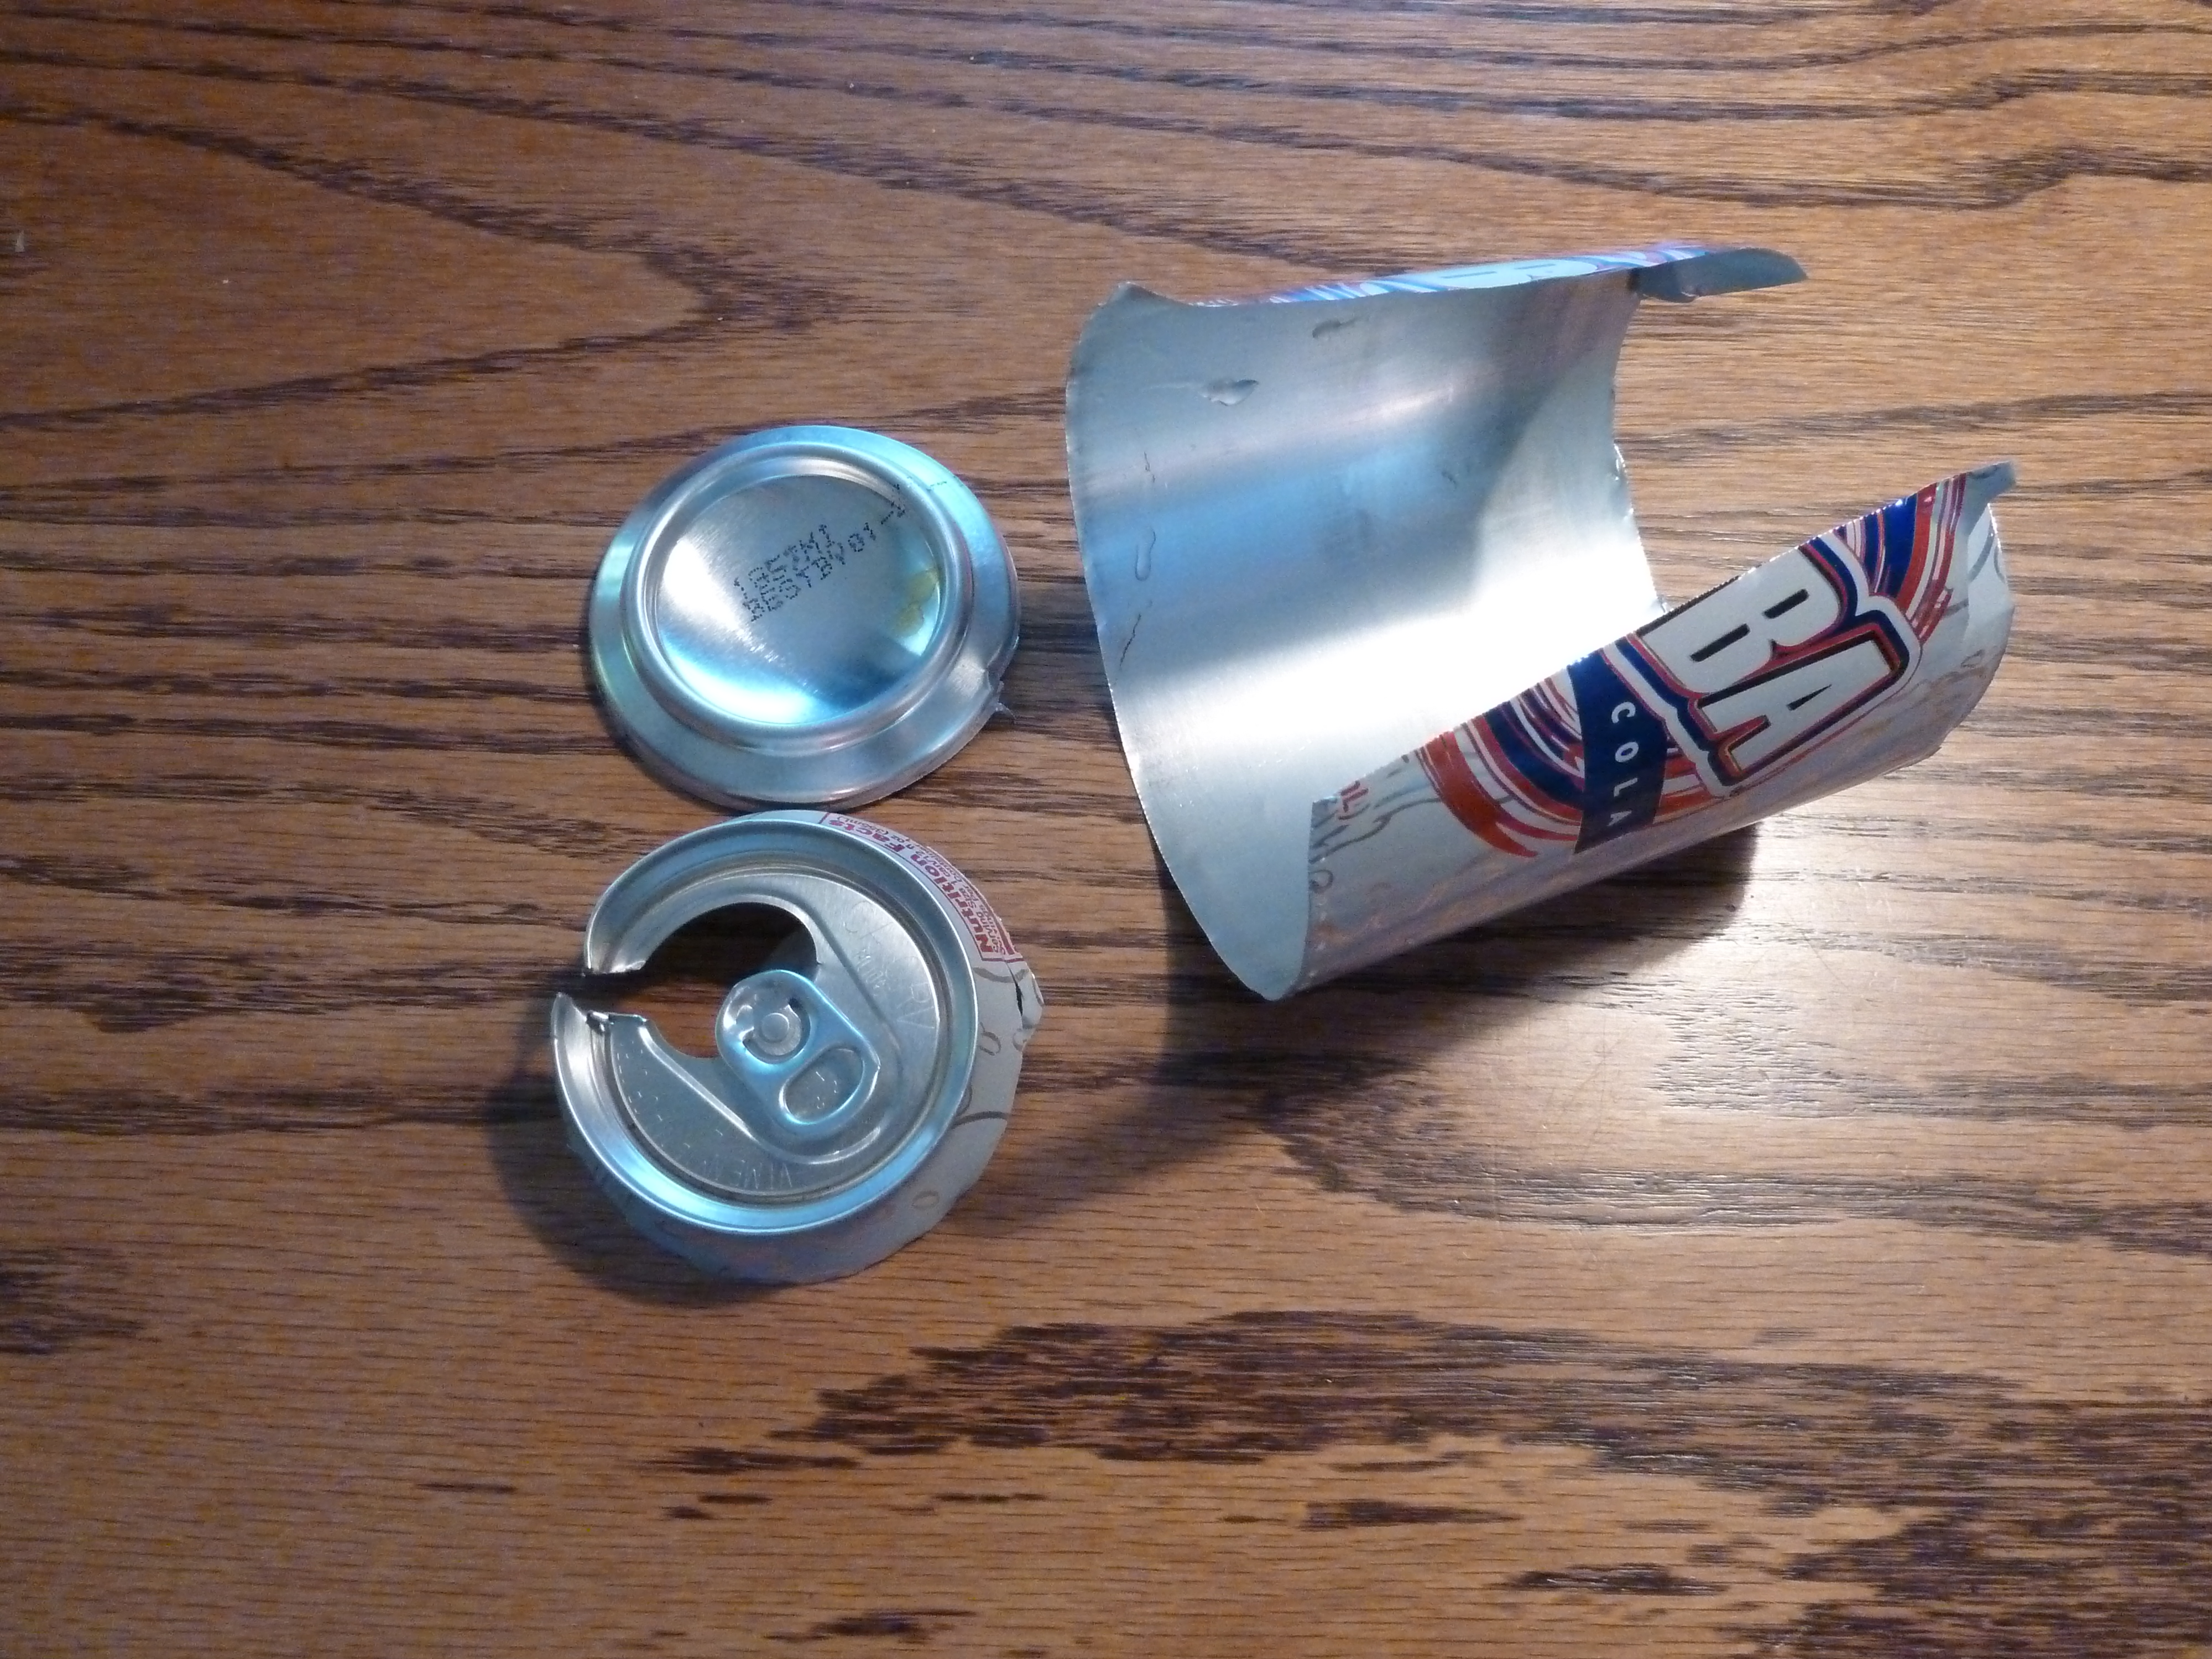
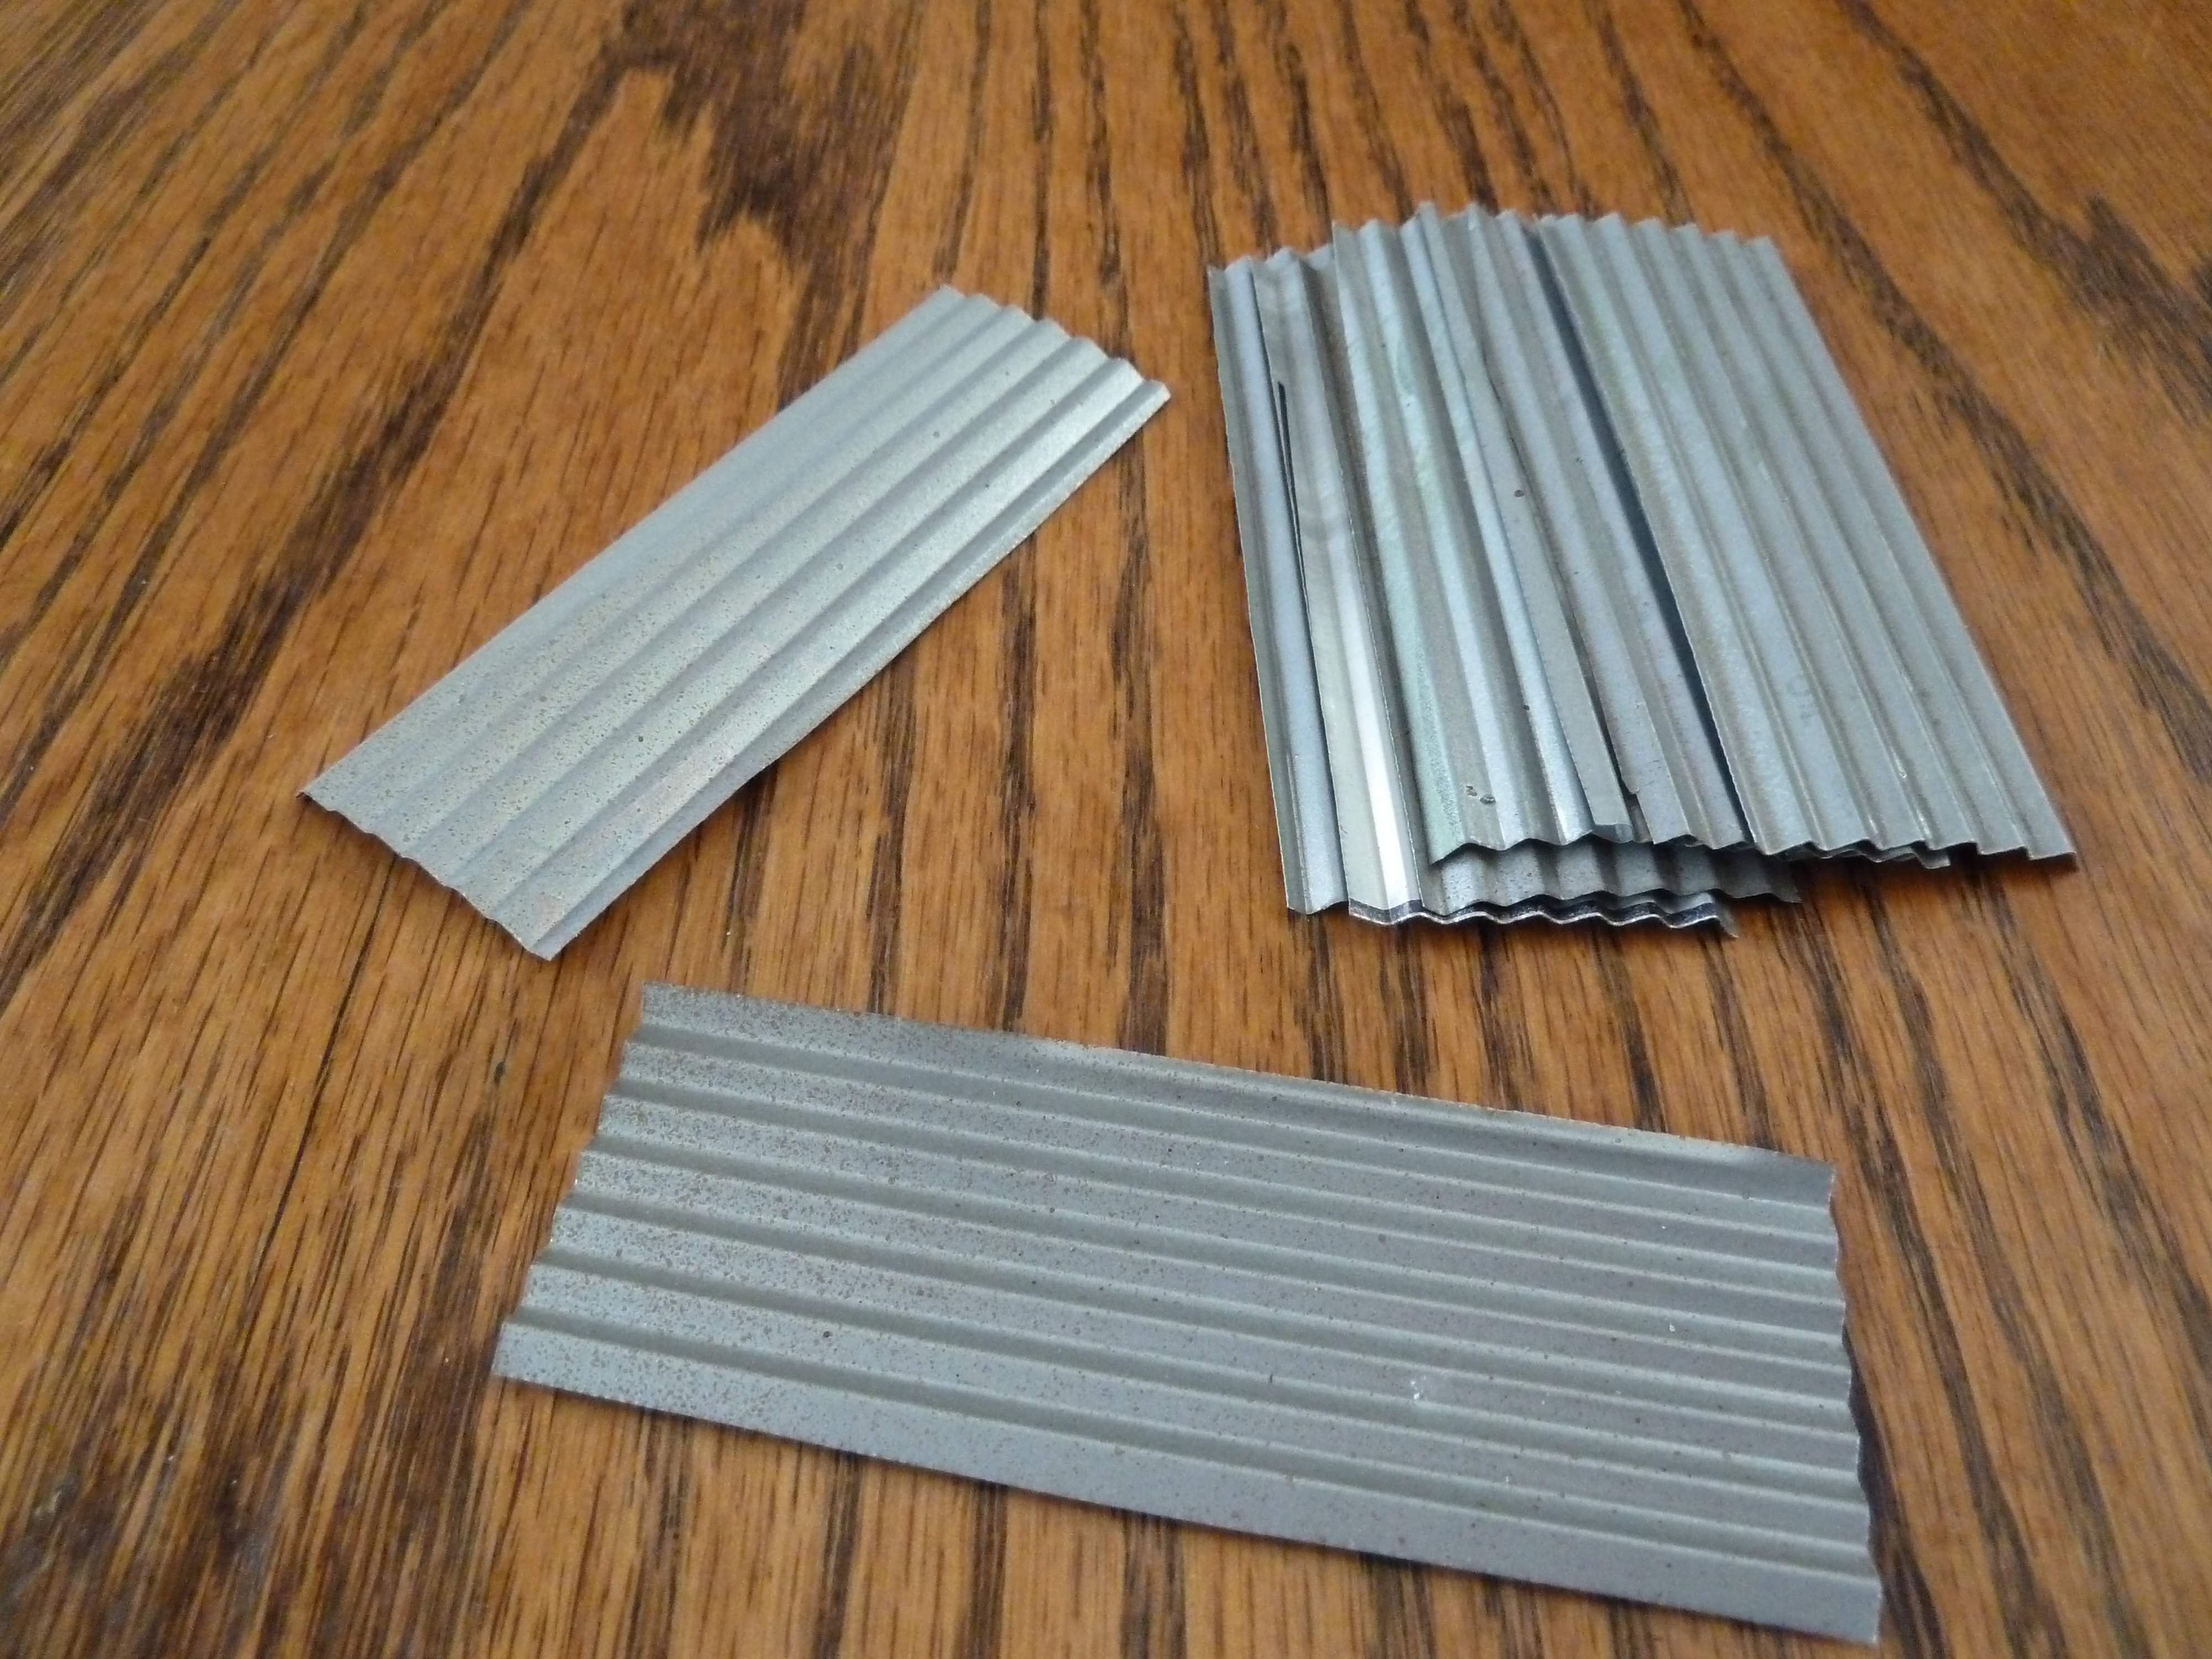
Once you have the materials, the first step is to remove the tops and bottoms of the soda cans. Be careful as the newly cut edges are sharp.

- Remove top & bottom of can
Then you need to straighten the metal by pulling it against any edge, such as a countertop in the direction opposite of the can’s curve. After a few times, I found the metal sheet to stay flat. Now is a good time to straighten the edges and cut the pieces to size you want.

- Using paper crimper to make corrugated siding
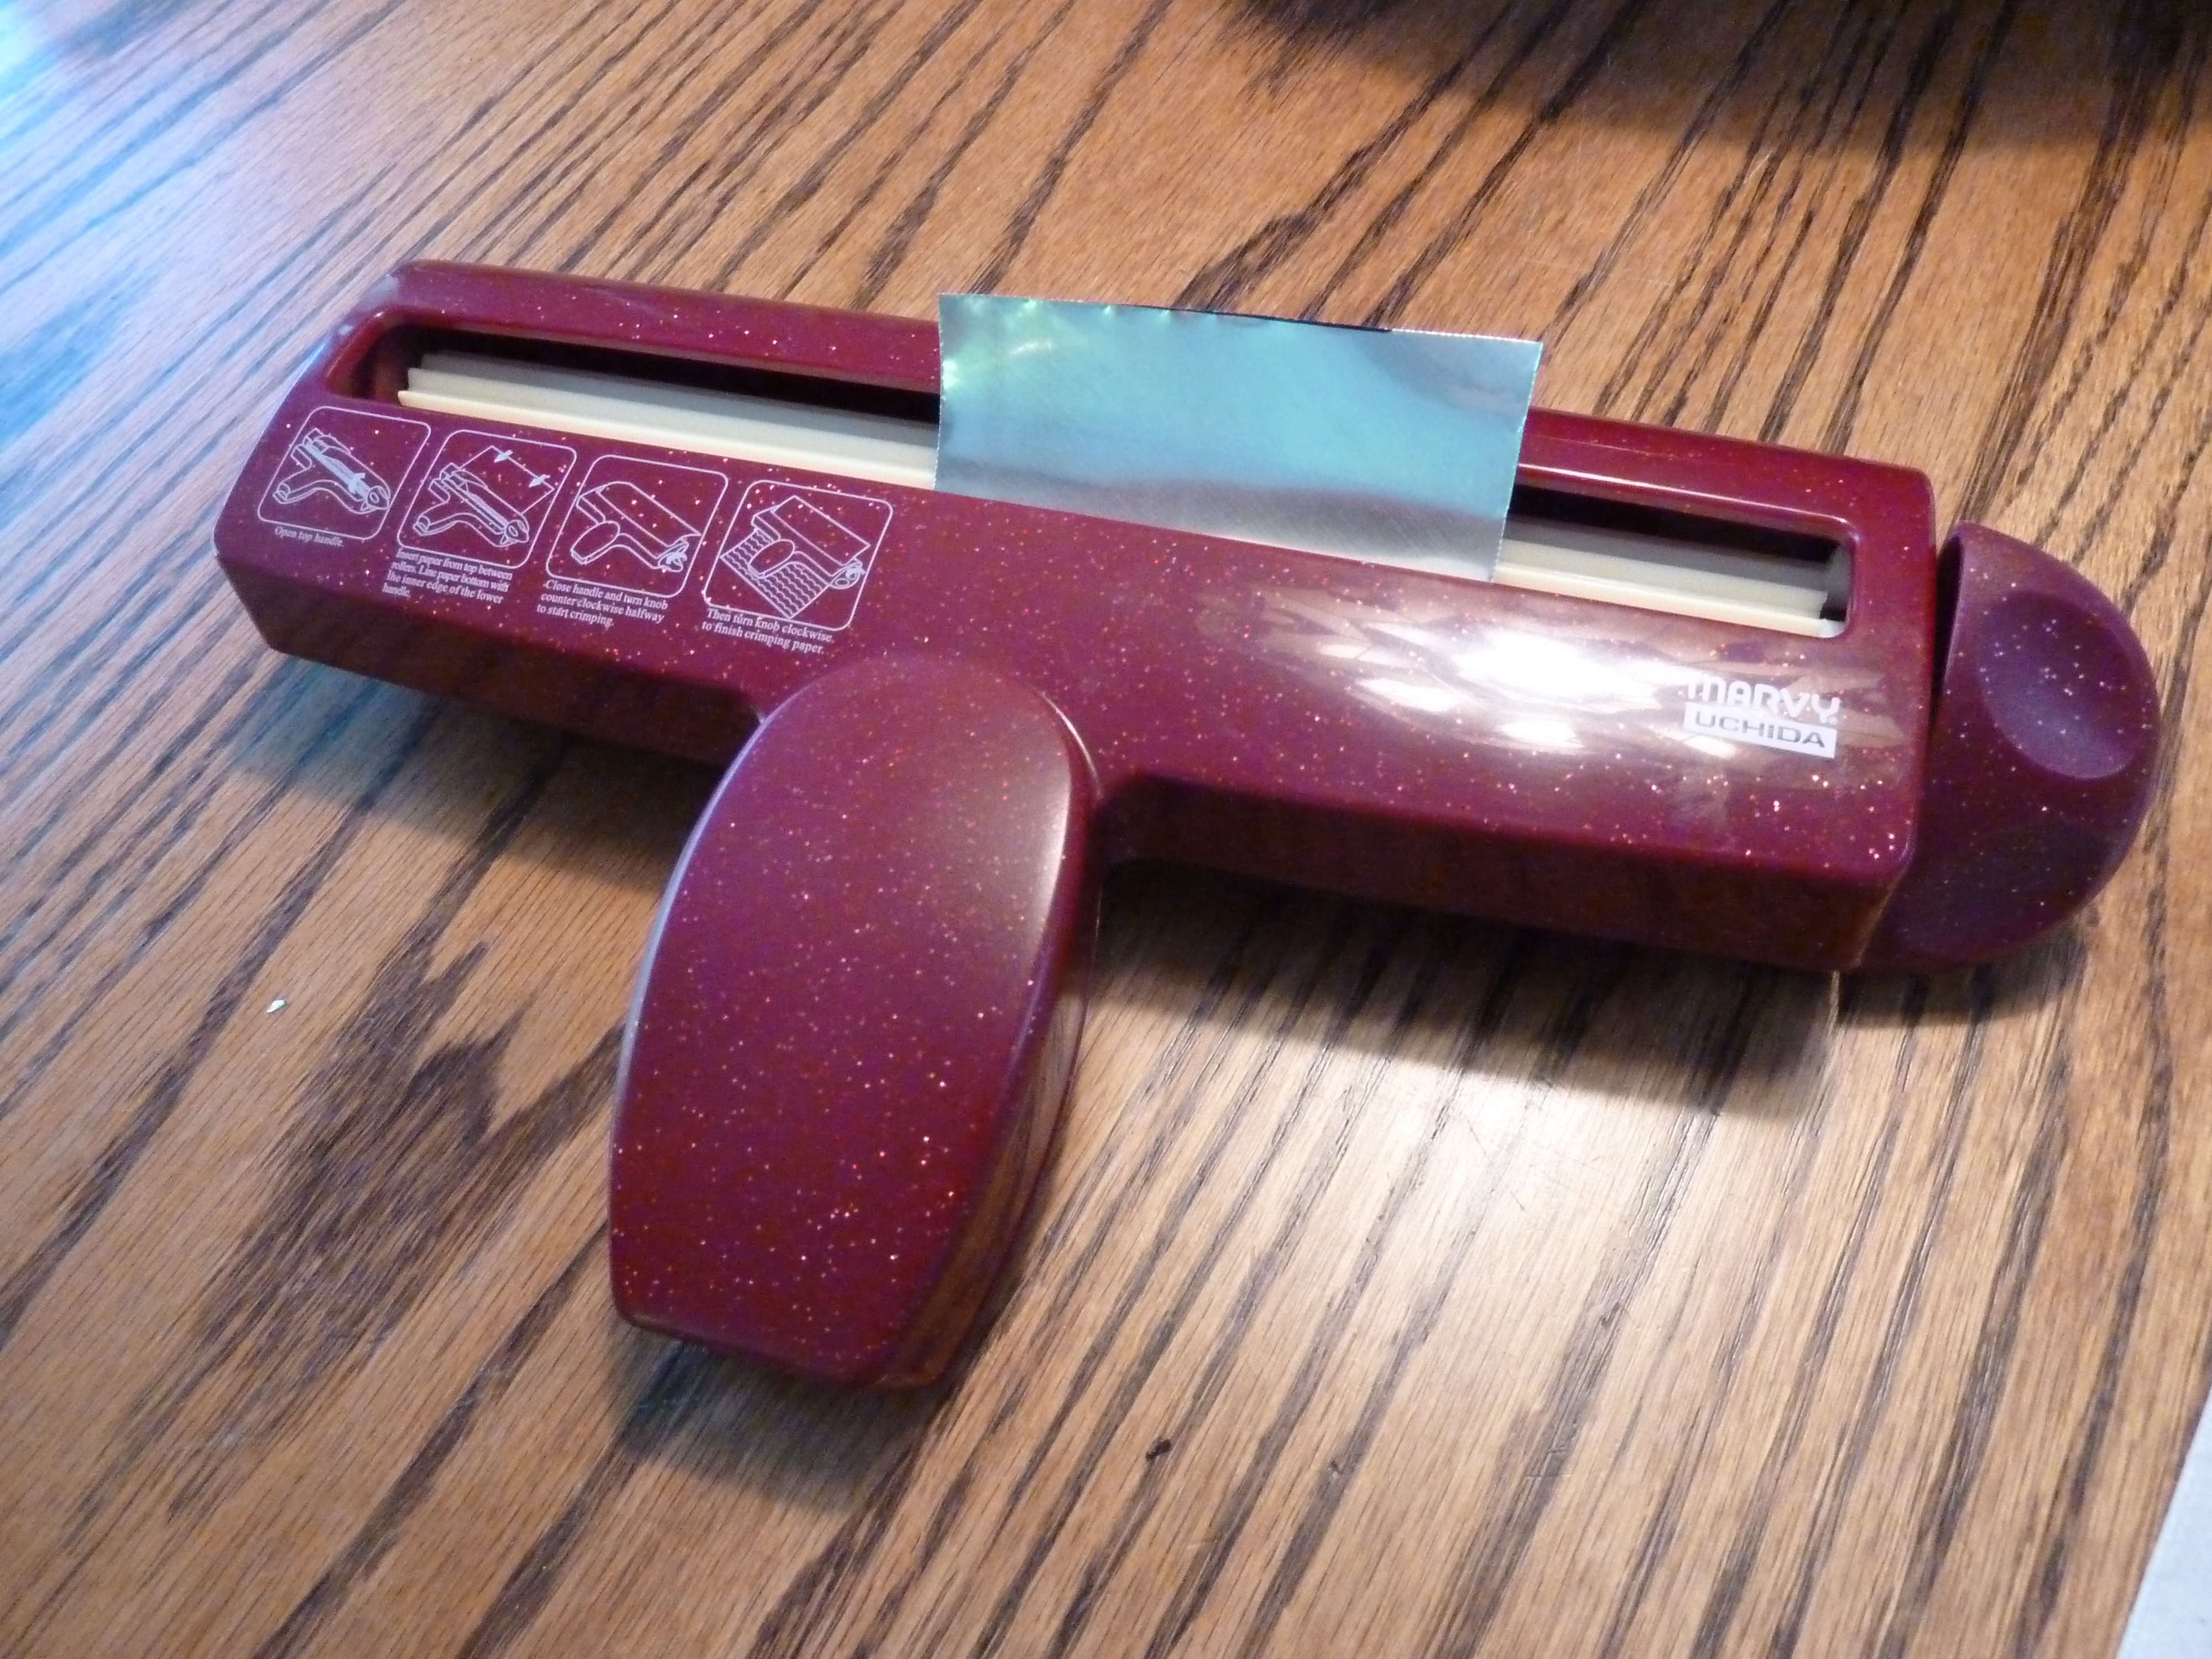
Then using the paper crimper, merely place the metal sheet in the crimper with the long edge placed in. Turn the crank back and forth until the metal is crimped. The corrugated metal sheets are now ready for use. However you may want to paint them with gray or aluminum paint or rust colored paint to make them look weathered.

- Right now I don’t have enough soda cans to make the necessary to make enough corrugated galvanized sheets for the job. As soon as we drink enough soda, I will up-date this post with a photo of the completed commissary.
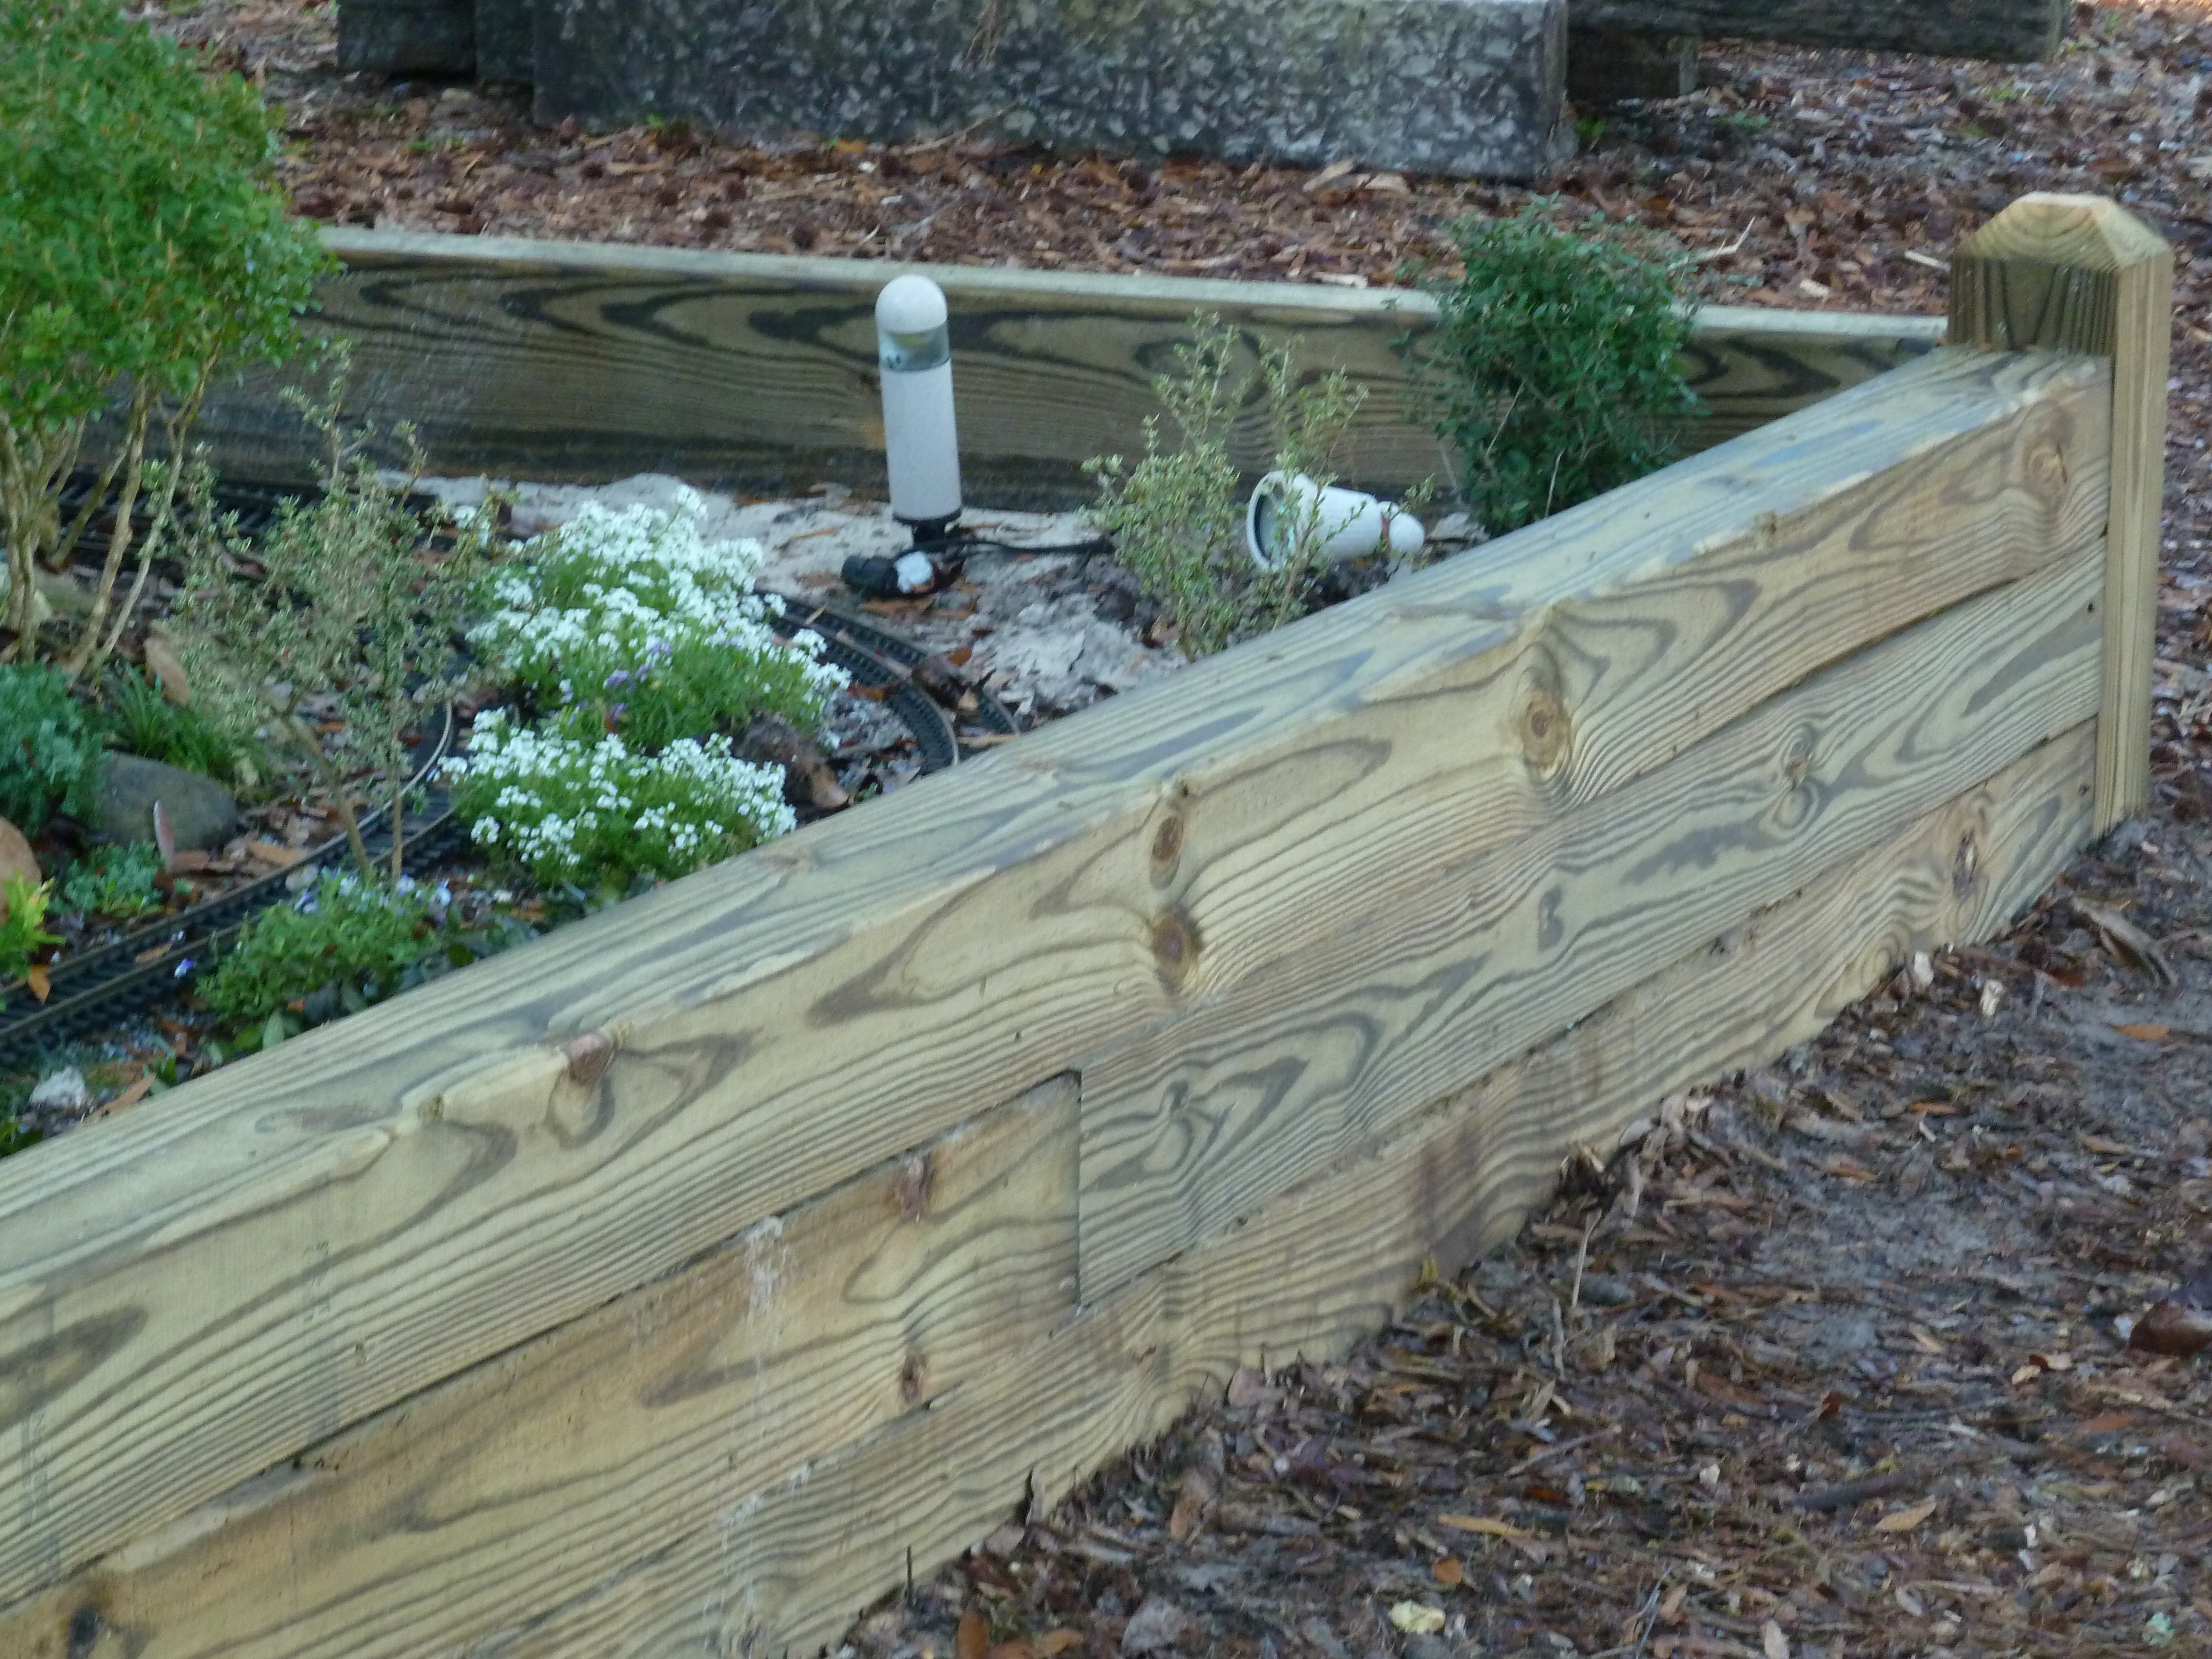
Replacing the retaining wall:
The photo below is a section of the layout right after the old railroad ties had been removed.
After removing the old ties, guidelines were put in.

New pressure-treated 6 x 6 timbers were purchased for constructing a new “wall” around the layout.
The retaining wall is finished…but nothing is functional since everything had to be dismantled in order to move things. Since the track had to be moved, each piece has to be screwed together and reconnected to power. All the buildings had to be moved, so now they have to be leveled, power restored for lighting and street lights and streets need to be put in. Because a larger pond was built in front of the mill and over two truckloads of fill-dirt were added to the layout, many plants had to be moved or “raised”. Now that the location of structures and track has been decided, lots of work begins.

Very nice work, just heard about Centralia & found your site, wonderful work!